Setting up an Amazon Echo usually takes about 10 minutes. You need the Echo, its correct power adapter, a phone or tablet with the Alexa app, an Amazon account, and a stable Wi-Fi connection. Once connected, Alexa can play music, answer questions, manage reminders, control compatible smart-home devices, and handle everyday voice commands.
Affiliate Disclaimer
This website participates in affiliate programs. We may earn a commission
when you purchase products through links on this page, at no additional
cost to you. Our recommendations are based on independent research and
honest opinions.
The process is fairly simple, but a few choices made during setup affect how well Alexa works later. Device placement, Wi-Fi selection, privacy settings, and voice recognition are all worth handling properly from the beginning. This guide walks you through the entire process and explains what to do if your Echo does not connect.
What You Need Before Starting
It helps to gather everything before plugging in the Echo. You will complete most of the setup through the Alexa app, so your phone should be connected to the Wi-Fi network you want the Echo to use.
Have these items ready:
- Your Amazon Echo, Echo Dot, Echo Pop, Echo Spot, or Echo Show
- The power adapter supplied with the device
- An Android phone, iPhone, or compatible tablet
- The latest version of the Amazon Alexa app
- Your Amazon account email address and password
- Your Wi-Fi network name and password
- Bluetooth and location permissions enabled when requested
If someone gave you a previously used Echo, make sure it has been removed from the previous owner’s Amazon account. You may also need to factory-reset it before beginning. Reset instructions differ between Echo generations, so identify the exact model before pressing any combination of buttons.
Find a Good Location for Your Echo
Place the Echo where it can clearly hear you and maintain a reliable Wi-Fi connection. A central, open location usually works better than a crowded shelf, closed cabinet, or corner behind a television. Keep a little space around the speaker so its microphones and audio are not obstructed.
Try to keep the Echo away from sinks, stoves, direct sunlight, and other sources of heat or moisture. It should also be separated from particularly loud appliances, since constant background noise may make voice recognition less reliable. A stable table, desk, or nightstand with a nearby electrical outlet is generally ideal.
For better sound, avoid pushing the speaker directly against a wall. If you are setting up an Echo Show, position the screen where you can see it comfortably without placing it in a highly private area. You can always move the device later, but the new location still needs strong Wi-Fi.
Download and Sign In to the Alexa App
Install the Amazon Alexa app from the Apple App Store or Google Play Store. If it is already installed, update it before starting. An older app version can sometimes cause device detection or Wi-Fi connection problems.
Open the app and sign in with the Amazon account you want associated with the Echo. This account will control device settings, connected services, shopping preferences, voice history, and compatible smart-home equipment. If several people will use the speaker, start with the account that will manage the household.
The app may request Bluetooth, local network, notification, microphone, or location access. Some permissions help the app find and configure nearby Echo devices. Read each request and enable the access needed for setup, knowing that you can review certain permissions in your phone settings later.
Plug In Your Amazon Echo
Connect the supplied adapter to the Echo and plug it into a working wall outlet. Echo speakers do not normally contain a battery, so they must remain connected to power during setup and everyday use. Do not use a random charger just because its connector happens to fit.
Wait for the device to start. On many Echo models, the light ring turns blue during startup and orange when the speaker enters setup mode. Echo devices with screens provide instructions directly on the display instead.
Startup can take a minute or two. If the device does not enter setup mode automatically, press and hold the Action button until the light turns orange. The button is generally marked with a dot, although its appearance and location can vary by model.
Add the Echo in the Alexa App
The app may display a message saying that a new Echo has been found. If that happens, select the device and follow the instructions. If Alexa does not find it automatically, you can add it manually.
In the Alexa app:
- Select Devices.
- Select the plus sign.
- Choose Add Device.
- Select Amazon Echo.
- Choose the appropriate Echo category and model.
- Follow the instructions displayed in the app.
Amazon’s official Echo setup instructions follow the same basic path. The exact wording may look slightly different after an app update, but the device is still added through the Devices section.
Choose the exact model when possible. Selecting the wrong generation can lead to confusing button instructions or failed detection. The model information may be printed on the bottom of the Echo, shown on its original packaging, or listed in the Amazon order history.
Connect the Echo to Wi-Fi
The Alexa app will display the available wireless networks. Select your home Wi-Fi network, enter the password carefully, and wait while the Echo connects. Keep your phone close to the speaker until the process is finished.
Use a private home network rather than a public guest network whenever possible. Hotel, college, and workplace networks that require a browser-based sign-in page may not work normally with an Echo. Networks with device isolation can also prevent your phone and speaker from communicating correctly.
If your router offers separate 2.4 GHz and 5 GHz networks, either may work depending on the Echo model. A 5 GHz connection can be faster at close range, while 2.4 GHz often reaches farther through walls. In practice, a strong and stable signal matters more than choosing the network with the larger number.
The app will confirm when the connection is successful. Alexa may then download an update, which can take several minutes. Leave the Echo connected to power and Wi-Fi rather than unplugging it during that process.
Select the Room and Confirm Your Address
The Alexa app may ask where the Echo is located. Choose a room such as Bedroom, Kitchen, Office, or Living Room. Clear room assignments become especially useful once you add more Echo speakers, lights, plugs, cameras, or thermostats.
Your device location helps Alexa provide local weather, time, traffic, and nearby information. Check that your home address and time zone are correct. An incorrect location can produce the wrong forecast, local results, or reminder times.
You can also give the Echo a descriptive name. “Living Room Echo” is much easier to recognize inside the app than a generic device name, especially when your household eventually has multiple speakers.
Set Up Voice Recognition
Alexa can work without a personal voice profile, but Voice ID can make responses more relevant. It may help Alexa distinguish between household members for calendars, contacts, music preferences, and certain personalized results.
The app will ask you to read several phrases aloud. Speak naturally from a normal distance instead of leaning directly over the Echo. Each additional household member can create a separate Alexa profile and Voice ID through the app.
Voice recognition is useful, but it should not be treated as secure identity verification for highly sensitive information. Anyone close enough to the speaker may still be able to make ordinary requests. Review purchasing controls and communication settings if children, guests, or roommates can access the device.
Connect Music and Other Services
Alexa can play music after you connect a supported service and select a default provider. Available choices can include Amazon Music, Spotify, Apple Music, Pandora, iHeartRadio, and other services depending on your location.
In the Alexa app, open More, then find Music & More or the music settings section. Link the service you already use and sign in when asked. You can then choose default services for music, artists, stations, and podcasts.
After setting a default, you can say, “Alexa, play relaxing music,” without naming the service every time. If you want a different provider for one request, include its name in the command.
You can also connect a phone directly over Bluetooth. Say, “Alexa, pair Bluetooth,” open your phone’s Bluetooth settings, and choose the Echo. Amazon also provides Bluetooth controls under the Echo’s device settings in the Alexa app.
Review Alexa’s Privacy Settings
Do not skip the privacy controls simply because the speaker is working. Echo devices listen locally for their wake word, but voice requests can be associated with your Amazon account once Alexa processes them. Amazon allows you to review and manage those interactions.
Open the Alexa app and go to:
- More
- Alexa Privacy
- Manage Your Alexa Data
Here you can review voice history, delete recordings and transcripts, adjust how long data is retained, and manage whether recordings may be used to improve Amazon’s services. Amazon’s Alexa privacy instructions provide the current menu path.
Every Echo also has a microphone-off control. Pressing it electronically disconnects the microphones and normally turns the indicator red. Echo Show models include additional camera controls, depending on the generation.
Try a Few Basic Alexa Commands
Once setup is complete, start with simple requests. These confirm that the microphones, internet connection, location, and linked services are working properly.
Try commands such as:
- “Alexa, what time is it?”
- “Alexa, what’s the weather?”
- “Alexa, set a timer for five minutes.”
- “Alexa, play some music.”
- “Alexa, remind me to call Mom at 7 p.m.”
- “Alexa, increase the volume.”
- “Alexa, what’s on my calendar tomorrow?”
- “Alexa, stop.”
You can change the wake word if another person or device in your home frequently triggers Alexa by accident. Available wake words depend on the device and region, but the setting is usually found under the individual Echo’s device settings.
Add Smart-Home Devices Carefully
An Echo can control compatible lights, plugs, thermostats, locks, cameras, and other equipment. Some products connect directly through Alexa, while others require you to install the manufacturer’s app and enable its Alexa skill first.
Set up each smart device in its own app before connecting it to Alexa. Give everything clear names such as “Desk Lamp” or “Bedroom Fan.” Avoid assigning several products vague names like “Light,” since Alexa may not know which one you mean.
Group devices by room once they are connected. If the Echo and smart lights are both assigned to the bedroom, you may be able to say, “Alexa, turn off the lights,” without stating the room name.
Be more cautious with locks, garage doors, cameras, and purchases. Review voice codes, account permissions, and confirmation requirements before allowing voice control of anything that affects physical access or spending.
What to Do if the Echo Will Not Connect
Most first-time setup problems involve the Alexa app, Wi-Fi password, setup mode, or router connection. Begin with the simple checks before resetting the device.
Try these steps in order:
- Confirm that the Alexa app is updated.
- Make sure Bluetooth and local network access are enabled.
- Re-enter the Wi-Fi password carefully.
- Move the Echo closer to the router.
- Restart your phone.
- Unplug the Echo for 30 seconds, then reconnect it.
- Restart the router and wait for the internet connection to return.
- Put the Echo back into setup mode.
- Try the other Wi-Fi band if your router separates 2.4 GHz and 5 GHz.
Amazon also recommends updating the app, restarting the Echo, and checking the Wi-Fi connection when setup fails. Its Echo Wi-Fi troubleshooting page is worth checking if the app displays a specific error.
If you changed your router or Wi-Fi password, you do not necessarily need to reset the entire Echo. Open Devices, select your Echo, open Device Settings, and choose the option to change or remove a Wi-Fi network.
When You Actually Need a Replacement Power Adapter
A new Echo normally includes the correct adapter, and that is the one I recommend using. A replacement becomes relevant when the original has been lost, physically damaged, or left behind during a move. It can also help when purchasing a used Echo that arrived without its power supply.
Do not choose an adapter based only on wattage or connector shape. Echo generations can have different electrical requirements, and some models that look similar do not use identical power supplies. Check the label on the Echo, the original adapter specifications, and the replacement listing before connecting anything.
The following two adapters are third-party replacement options rather than Amazon-manufactured accessories. Their listings claim compatibility with several Echo products, but you should verify your exact model and generation before buying.
1
15W Alexa Power Adapter Replacement: Best for Wider Listed Compatibility

The 15W Alexa Power Adapter Replacement is listed for the Echo Dot 3rd, 4th, and 5th generations, Echo Dot Kids Edition, Echo Show 5, and Fire TV Cube. That broad list may make it useful when you are unsure which Echo adapter was misplaced, but the product name alone is not enough to confirm compatibility.
Before ordering, turn over your Echo and locate its model number and electrical information. Compare both with the Amazon listing, including any compatibility exclusions in the description. Echo Show and Fire TV Cube generations can differ, so a generic reference to the product family should not be treated as confirmation that every version is supported.
At the supplied price of $15.98, this is the more expensive of the two replacement options. The listing had a 4.6-star rating from 138 reviews and indicated more than 100 purchases in the previous month when the information was provided. Those figures can change and should not replace checking recent reviews for heat, fit, cable quality, or early failure reports.
This adapter is a better fit if:
- Your exact device appears in the compatibility list.
- You need a replacement for more than just an Echo Dot.
- You have confirmed the connector and electrical output.
- You value the broader stated device coverage over the lowest price.
2
15W Power Cord Adapter With 5-Foot Cable: Best Budget Replacement
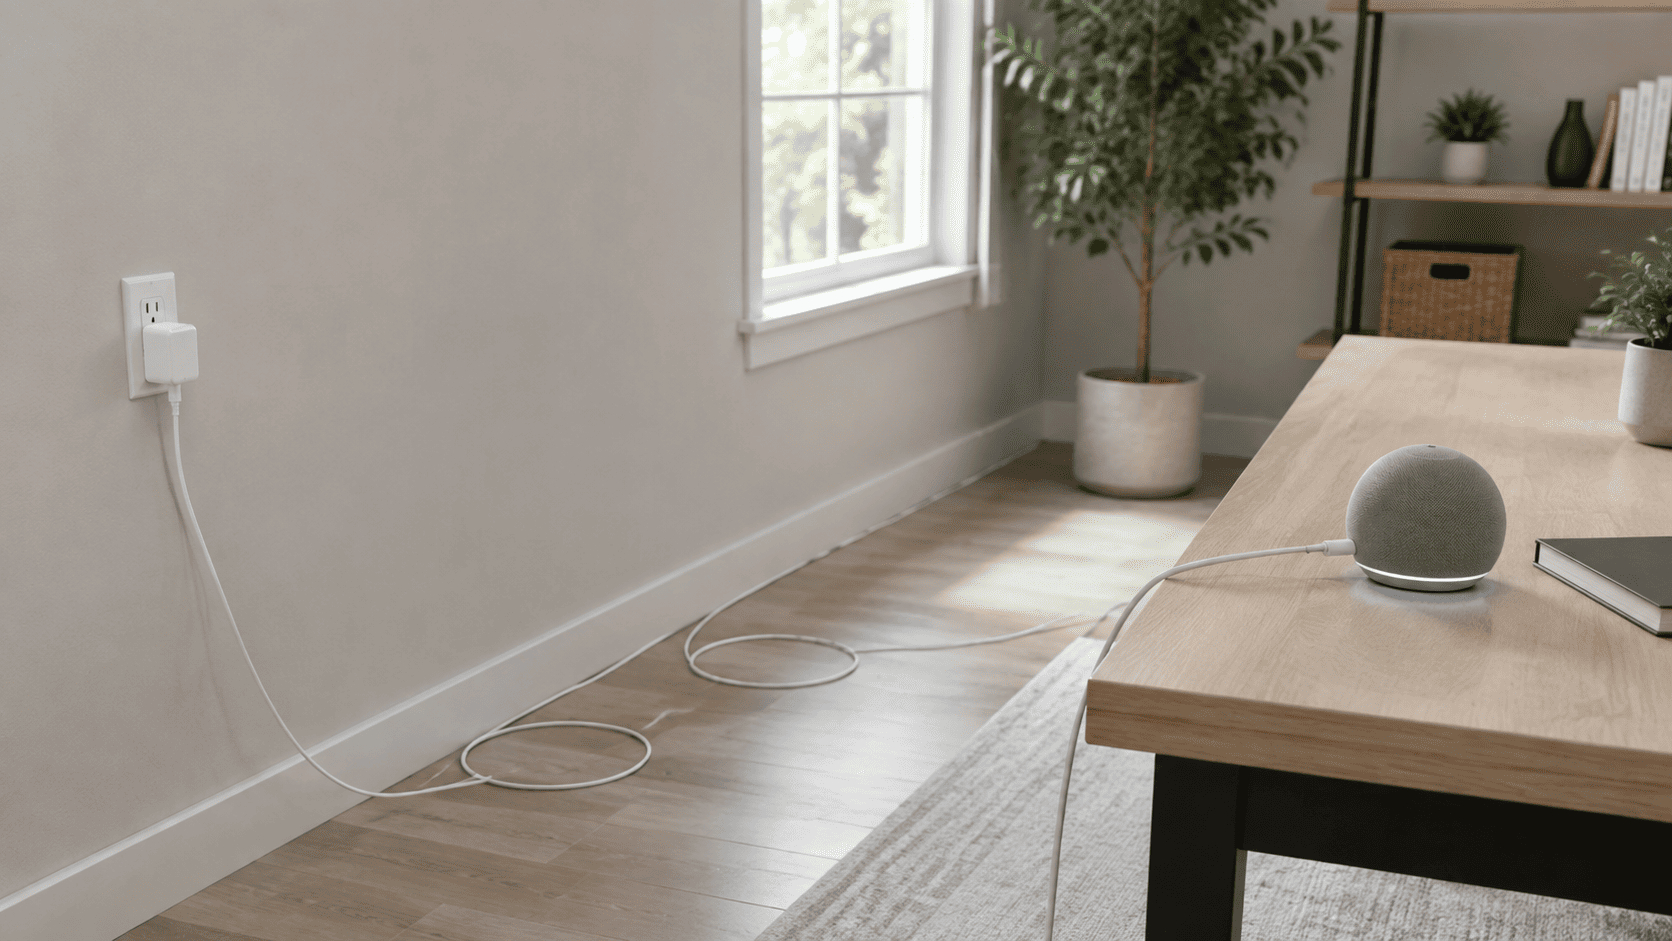
The 15W Power Cord Adapter with a 5-foot cable is listed for Echo Dot 3rd, 4th, and 5th generations, Echo Pop, Kids Edition devices, Fire TV Cube, and other compatible smart speakers. Its longer cable may be helpful when the Echo sits on a shelf or table that is not directly beside an outlet.
A longer cord gives you more placement flexibility, but it should still be routed safely. Keep it away from walkways, chair legs, water, pets, and places where it may be pinched behind furniture. Avoid tightly coiling excess cable around the power block, particularly if the adapter becomes warm during normal operation.
At the supplied price of $6.99, it is the more affordable option. The listing had a 4.5-star rating from approximately 1,700 reviews and showed more than 4,000 purchases in the previous month when the details were provided. Its larger review history offers more feedback to examine, but compatibility and recent review quality still matter more than sales volume.
This adapter is more suitable if:
- You want the lower-priced option.
- A 5-foot cord would improve device placement.
- Your exact Echo generation is explicitly supported.
- You have checked the required voltage, current, polarity, and connector.
- The recent reviews do not reveal a pattern of overheating or poor fit.
Complete Your Echo Setup the Right Way
For most people, the proper setup is simple: use the included power adapter, install the latest Alexa app, connect the Echo to a reliable private Wi-Fi network, and assign it to the correct room. Afterward, set up Voice ID, connect your preferred music service, and review Alexa’s data and purchasing controls.
If the Echo will not connect, update the app and restart the speaker before attempting a factory reset. Wi-Fi passwords, weak signals, and devices that are not in setup mode cause many first-time problems.
The $15.98 replacement adapter is the stronger choice when its broader stated compatibility includes your exact model. The $6.99 adapter makes more sense when you have confirmed compatibility and want an affordable cord with extra reach. In either case, matching the electrical specifications is more important than saving a few dollars or choosing the adapter with the highest sales count.