Earbuds and headphones collect more than dust. Earwax, skin oil, sweat, makeup, lint, and pocket debris can build up on speaker meshes, ear tips, cushions, and charging cases surprisingly quickly.
Affiliate Disclaimer
This website participates in affiliate programs. We may earn a commission
when you purchase products through links on this page, at no additional
cost to you. Our recommendations are based on independent research and
honest opinions.
Cleaning them regularly can help with comfort, hygiene, charging reliability, and sometimes even sound quality. The important part is doing it gently. Too much liquid, a sharp tool, or aggressive scrubbing can turn a five-minute cleaning job into damaged speakers or charging contacts.
In this guide, I’ll show you how to clean earbuds and headphones safely, what you should avoid, and which parts need different treatment.
Before You Start, Know What Can Actually Cause Damage
The biggest mistake is treating headphones like ordinary plastic accessories.
Inside even a small pair of wireless earbuds are speakers, microphones, batteries, sensors, charging contacts, and delicate mesh openings. Over-ear headphones add hinges, padded cushions, internal wiring, and sometimes several external microphones for active noise cancellation.
That means more cleaning power is not necessarily better.
A safe cleaning routine should remove dirt without:
- Pushing debris deeper into speaker mesh
- Getting liquid inside the electronics
- Scratching charging contacts
- Damaging ear cushions
- Blocking microphones
- Loosening protective mesh
- Leaving moisture inside a charging case
The exact cleaning instructions can also differ between models, so check the manufacturer’s instructions when possible.
Apple, for example, now provides a specific cleaning process for certain AirPods meshes that uses micellar water, distilled water, and a soft-bristled brush. That does not mean you should automatically use the same method on every wireless earbud.
What You Need for Basic Headphone Cleaning
You probably already have most of what you need.
For routine cleaning, I like to keep things simple:
- A soft, dry, lint-free cloth
- A small soft-bristled brush
- Cotton swabs
- Clean water
- A dry paper towel or microfiber cloth
- A clean workspace with good lighting
Depending on your specific earbuds, removable ear tips can usually be cleaned separately. A dedicated electronics cleaning tool can also make small speaker openings and charging cases easier to work around, but you don’t need one for every cleaning session.
What I would not grab first
Avoid reaching immediately for whatever household cleaner happens to be nearby.
Products containing bleach, strong solvents, or harsh chemicals may affect finishes, adhesives, plastic, leather-like materials, or ear cushions.
Sharp metal tools deserve caution too. A pointed object may seem perfect for pulling wax out of a tiny opening, but it is also very easy to damage the mesh underneath or push debris farther inside.
The safest approach is usually to start dry and add moisture only when the manufacturer says it is appropriate.
Turn Everything Off Before Cleaning
This step is especially important with full-size headphones.
Turn wireless headphones off and disconnect any charging or audio cable before cleaning them. Sony specifically recommends powering off compatible over-ear headphones and disconnecting the USB cable before cleaning.
For earbuds, remove them from your ears and take them out of the charging case.
If they have removable silicone or foam ear tips, take those off before cleaning the earbud body. This gives you better access and prevents loose dirt from getting trapped between the tip and speaker opening.
Give wet headphones time to dry
If you’ve just finished a workout or got caught in the rain, don’t immediately put damp headphones back into their case.
Sweat and moisture can remain around charging contacts and openings. Sony warns that moisture left on headphones can contribute to deterioration and problems around charging areas.
Wipe visible moisture away first and let everything dry thoroughly at room temperature.
How to Clean Wireless Earbuds Safely
Earbuds need a little more patience because the speaker openings are so small.
Start with the outside body.
Use a soft lint-free cloth to wipe away skin oil, fingerprints, and loose dirt. If there is debris around seams, microphones, or other small openings, use a soft brush with light strokes.
You are trying to lift debris away, not push it into the earbud.
Be Gentle Around the Speaker Mesh
The mesh is usually where the most noticeable buildup appears.
Earwax can slowly cover part of the opening, especially if you use your earbuds every day. If enough material builds up, one side may even begin to sound quieter than the other.
Start by holding the earbud so loose debris can fall away from the opening rather than deeper inside it.
Then use a soft brush to loosen surface debris.
Do not scrape aggressively
This is where people often cause damage.
Avoid:
- Jabbing the mesh
- Pressing hard with a brush
- Pushing a cotton swab into the opening
- Scraping with a pin or knife
- Pouring cleaning liquid directly onto the speaker
- Blasting debris with high-pressure air
The mesh may look sturdy, but the speaker and acoustic components behind it are much more delicate.
AirPods need model-specific care
Apple’s current instructions are a good example of why model-specific guidance matters.
For certain AirPods 3, AirPods 4, AirPods Pro 2, and AirPods Pro 3 models, Apple gives detailed cleaning instructions involving a soft-bristled toothbrush, specified micellar water, distilled water, and a drying period of at least two hours.
Apple also warns against using sharp objects or abrasive materials.
So if you own AirPods, check the cleaning instructions for your exact generation instead of assuming an old cleaning tutorial applies to every model.
How to Clean Silicone Ear Tips
Removable silicone ear tips are much easier to clean because you can separate them from the electronics.
Take the tips off first.
For AirPods Pro, Apple says the removed ear tips can be rinsed with water, but household cleaners or soap should not be used. The tips need to be completely dry before being attached again.
For other earbud brands, check the manual before rinsing the tips.
A basic process usually looks like this:
- Remove the ear tips carefully.
- Wipe or rinse them according to the manufacturer’s instructions.
- Remove any visible debris.
- Dry them thoroughly with a clean cloth.
- Leave them out until there is no moisture remaining.
- Reattach them securely.
Don’t put damp tips back on
This sounds obvious, but it is easy to rush.
Moisture can become trapped between the ear tip and earbud nozzle. Give the tips enough time to dry instead of wiping them once and immediately reinstalling them.
If your ear tips have become permanently discolored, cracked, loose, or stretched, cleaning may not be enough. Replacement tips are usually a better option at that point.
Foam Ear Tips Need Different Treatment
Foam tips should not automatically be cleaned the same way as silicone.
Foam can absorb moisture and may lose its shape or surface texture depending on the material. Some manufacturers recommend only gentle wiping, while others provide specific washing instructions.
Check the instructions that came with the tips before soaking them.
If foam tips remain dirty, smell unpleasant, or no longer expand properly after being compressed, replacement may make more sense than aggressive cleaning.
Don’t Forget the Charging Case
A perfectly clean pair of earbuds can go straight back into a dirty case.
Charging cases collect lint, dust, earwax, and pocket debris around the earbud slots and charging contacts. Over time, that dirt can interfere with how securely an earbud sits inside.
Start by removing the earbuds.
Use a soft, dry brush for loose debris and a lint-free cloth for the outside.
Be careful around the charging contacts
Don’t scrape the metal contacts with a pin or other hard object.
You also don’t want liquid collecting at the bottom of the earbud slots or entering the charging port.
For AirPods charging cases, Apple recommends a soft, dry, lint-free cloth. The cloth can be slightly dampened with isopropyl alcohol if necessary, but liquid should not enter the charging ports. Apple also recommends a clean, dry, soft-bristled brush for debris around the port.
Let the case dry before putting the earbuds back
If you used any approved moisture while cleaning, leave the case open until it is completely dry.
Putting earbuds into a damp case defeats the purpose of cleaning them and introduces moisture right next to the charging contacts.
The Hard Part Is Usually the Tiny Spaces
The large surfaces are rarely difficult.
It’s the speaker mesh, narrow case openings, charging areas, and tiny gaps around an earbud that take patience. That’s also where people are most tempted to reach for pins, paper clips, or anything else that fits.
There are safer tools designed specifically for that kind of detailed cleaning.
That’s where a small earbud cleaning pen or a cleaning putty kit can become useful, but the right choice depends on what you’re trying to clean. A simple three-in-one tool is very different from a kit made for speaker openings, charging ports, and other electronics.
How to Clean Over-Ear Headphones Safely
Over-ear headphones are easier to wipe down than earbuds, but they have their own weak points. Ear cushions absorb skin oil and sweat, headbands collect hair products, and small microphone openings can gather dust over time.
The safest approach is to clean each material separately instead of wiping the entire headphone with the same cloth or cleaner.
Start by turning the headphones off and disconnecting all cables. If the ear cushions are removable, check the manufacturer’s instructions before taking them off. Some pads twist or clip into place, while others are attached more permanently.
Clean the Ear Cups With a Soft Cloth
The outside of the ear cups usually only needs a soft, dry microfiber cloth.
That should remove most:
- Fingerprints
- Dust
- Skin oil
- Light makeup
- Everyday surface dirt
If dry wiping is not enough, slightly dampening the cloth may be appropriate for some models, but never soak it.
The important part is keeping moisture away from microphone openings, buttons, charging ports, seams, and vents.
Don’t spray cleaner directly onto the headphones
This is one of the easiest ways to accidentally get liquid inside.
If your headphone manufacturer allows a damp cloth or specific cleaning product, apply it to the cloth first. Never spray the ear cup itself.
You want the cloth barely damp, not wet enough to leave droplets behind.
Ear Cushions Need More Attention Than Most People Give Them
The ear pads are usually the dirtiest part of over-ear headphones.
They sit directly against your skin, which means they collect sweat, oil, and dead skin every time you use them. If you wear headphones for several hours a day, buildup happens faster than you might expect.
For routine cleaning, wipe the pads gently with a soft cloth after use.
If your manufacturer allows it, a lightly damp cloth can help with more stubborn surface dirt.
Different materials need different treatment
Not every ear cushion should be cleaned the same way.
Synthetic leather, fabric, velour, memory foam, and real leather all react differently to moisture and cleaning products.
For example:
- Fabric pads may tolerate gentle surface cleaning.
- Synthetic leather should not be soaked.
- Memory foam can hold moisture for a long time.
- Real leather may require manufacturer-approved care products.
If you’re unsure what the pads are made from, check the headphone manual before using soap, alcohol, or other cleaners.
Sweat Is More Damaging Than It Looks
If you wear headphones while exercising, sweat deserves extra attention.
Salt and moisture can slowly affect cushions, coatings, charging contacts, and other exposed parts. Even headphones advertised as water-resistant should not automatically be treated as washable.
After a workout:
- Wipe away visible sweat.
- Pay attention to the ear cushions and headband.
- Let the headphones air dry.
- Avoid putting them immediately into a closed case.
- Do not charge them while moisture is still present.
A few minutes of care after exercise can prevent a much harder cleaning job later.
How to Deal With Smell Without Soaking the Headphones
If ear cushions start smelling unpleasant, adding more liquid is usually not the answer.
First, clean the surfaces according to the manufacturer’s instructions and let the headphones air out completely. A dry, ventilated area is better than sealing them inside a case immediately after use.
If removable cushions continue to smell after proper cleaning, replacing the pads may be more practical.
Old cushions also lose firmness over time, so replacement can improve comfort at the same time.
Clean the Headband Too
The headband gets ignored because it doesn’t look as dirty as the ear pads.
But it sits against your hair and scalp, so it collects skin oil, sweat, and hair products.
Use a soft cloth and wipe it gently from end to end.
If the headband has padding, avoid saturating it. Moisture can soak into foam and take much longer to dry than you’d expect.
What About Headphone Grilles and Microphones?
Be careful here.
Many noise-cancelling headphones have several tiny microphones built into the ear cups. These microphones help the headphones measure outside noise, so blocking them with dirt can potentially affect performance.
Use a dry, soft brush for visible debris.
Avoid:
- Pushing cotton swabs into openings
- Scraping holes with metal objects
- Using compressed air at close range
- Dripping liquid into microphone openings
Cleaning around an opening is different from cleaning inside it.
That distinction matters.
How Often Should You Clean Earbuds and Headphones?
There isn’t one perfect schedule.
How often you clean them depends on how often you wear them, where you use them, and how much sweat or earwax they encounter.
For normal everyday use, I would do a quick wipe regularly and save deeper cleaning for when it is actually needed.
A practical routine
For earbuds, I would:
- Wipe the outside every few uses.
- Check the speaker mesh weekly.
- Clean removable tips when buildup becomes visible.
- Check the charging case every week or two.
For over-ear headphones:
- Wipe ear cushions regularly.
- Clean sweat off after exercise.
- Check the headband every few weeks.
- Inspect microphone openings and seams occasionally.
- Deep clean only when necessary.
The goal is to prevent heavy buildup.
Cleaning lightly and often is safer than waiting six months and then attacking hardened dirt with sharp tools.
How Do You Know When Cleaning Is Actually Needed?
Visible dirt is the obvious sign, but there are others.
Your earbuds or headphones may need attention if:
- One earbud sounds slightly quieter.
- Silicone tips feel slippery.
- Ear cushions feel oily.
- Your charging case has lint inside.
- An earbud does not sit properly in the case.
- Headphones smell different after long sessions.
- Dust is visible around speaker or microphone openings.
Not every audio problem is caused by dirt, of course. But cleaning is an easy thing to rule out before assuming a driver or battery has failed.
When Basic Cleaning Tools Stop Being Enough
A microfiber cloth and soft brush are enough for most routine cleaning.
The challenge comes when dirt collects inside narrow areas. Earbud cases, small speaker meshes, and charging slots are difficult to reach without using something more precise.
That’s where dedicated electronics cleaning tools start to make sense.
The key is choosing a tool that matches the job.
If you mainly want something small for AirPods and charging cases, a cleaning pen is probably enough. If you’re cleaning several devices and want something that can lift debris from ports and speaker openings, a putty-based kit gives you more flexibility.
1
Hyashee Cleaner Kit for AirPods Pro 3/2/1
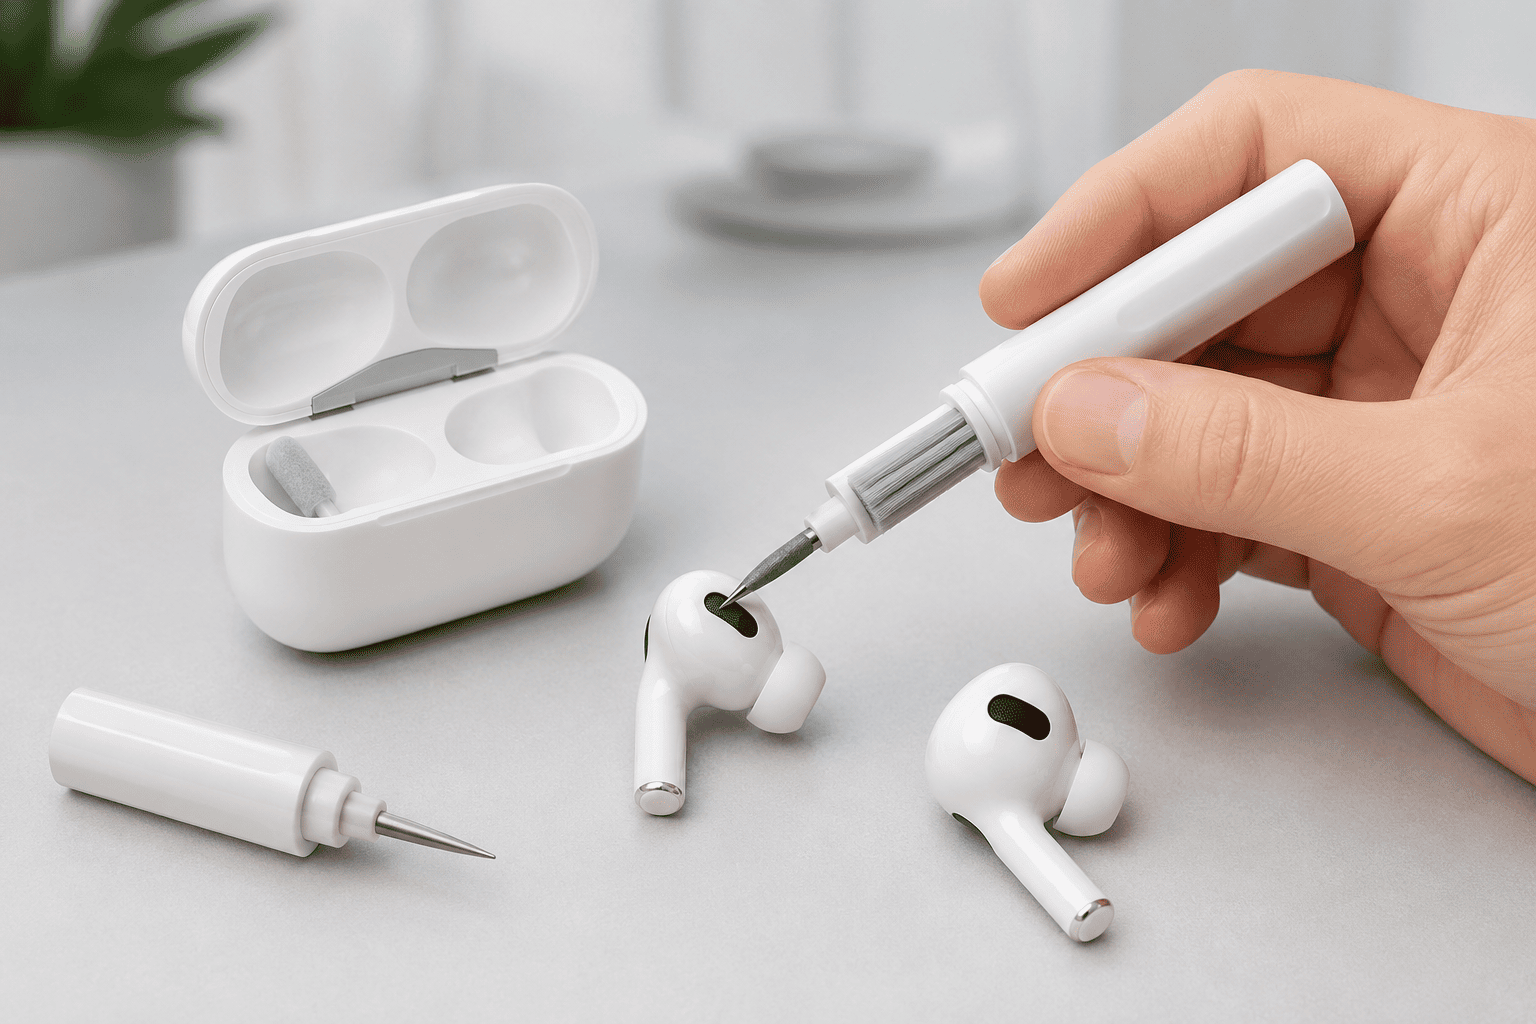
The Hyashee Cleaner Kit for AirPods Pro 3/2/1 is the simpler option here.
It’s built around a three-in-one cleaning pen with a metal tip, soft brush, and flocking sponge. That combination is meant to handle different parts of an earbud setup without carrying several separate tools.
At about $6.99, it is inexpensive enough to make sense for someone who uses AirPods or other wireless earbuds every day.
Best for routine AirPods and earbud cleaning
The soft brush is the part I would use most often.
It’s useful for loosening dry debris around speaker meshes, seams, and case openings without reaching for a pin or paper clip.
The flocking sponge is better suited to larger recessed areas, such as the inside of a charging case.
The metal tip needs more care.
Even though it’s included as a cleaning tool, I would still avoid pressing it against delicate speaker mesh or digging aggressively into any opening. Use it only where you can clearly see what you’re removing.
Who it makes sense for
I would consider this kit if you:
- Use AirPods every day.
- Want one small tool instead of several brushes.
- Regularly see lint inside your charging case.
- Want something inexpensive for routine maintenance.
- Prefer dry cleaning methods for small spaces.
It also works as a general electronics cleaning tool for things like keyboards and small device openings, which makes the price easier to justify.
For basic maintenance, this is probably all most people need.
But if you’re dealing with debris stuck inside speaker holes or charging ports, a different type of cleaning tool may be more useful.
Why Cleaning Putty Can Be Useful
Some dirt is difficult to brush away because it sits inside tiny openings.
That’s where cleaning putty works differently.
Instead of scraping debris out, the material presses against a surface and lifts loose dirt away when you remove it.
That can be useful around speakers, ports, and other awkward areas where brushes cannot easily reach.
There is one important rule, though.
Don’t use random household putty or adhesive material on electronics. Products that are too sticky can leave residue behind or get stuck inside small openings.
Use something designed specifically for electronics.
2
STIKKI Cleaning Putty & Precision Tools

The STIKKI Cleaning Putty & Precision Tools is the more versatile kit of the two.
It combines cleaning putty with precision tools intended for earbuds, phone speakers, USB-C charging ports, and other electronics.
At around $15.95, it costs more than the Hyashee pen, but it also covers more types of cleaning.
Best for several devices, not just earbuds
This kit makes more sense if you’re the kind of person who ends up cleaning everything at once.
You might start with your earbuds, then notice lint in your phone’s charging port, dust around a laptop speaker, or debris around another electronic device.
That’s where the broader set of tools becomes useful.
The putty is especially interesting because it can lift surface debris rather than forcing you to scrape inside small openings.
Use the precision tools carefully
A dedicated tool is still a tool.
You can damage electronics if you push too far into a charging port or apply too much pressure to a speaker mesh.
I would use the putty and softer tools first, then bring in the precision tools only when necessary.
The STIKKI kit makes the most sense if you:
- Clean several electronic devices.
- Want cleaning putty as well as brushes or picks.
- Deal with lint in charging ports.
- Want a more complete kit.
- Prefer having several cleaning methods available.
For someone who only cleans AirPods occasionally, the less expensive Hyashee tool is probably enough.
For multiple phones, earbuds, keyboards, and other electronics, the STIKKI kit is the more flexible choice.
Which Cleaning Kit Should You Choose?
I would not overthink this.
Choose based on what you’re actually cleaning.
Choose the Hyashee Cleaner Kit if:
- AirPods or wireless earbuds are your main concern.
- You want something small and inexpensive.
- You mostly need a brush and case-cleaning tool.
- You don’t want to keep a larger electronics kit around.
Choose the STIKKI kit if:
- You clean phones and other electronics too.
- You want cleaning putty.
- Charging ports regularly collect lint.
- You prefer a wider range of tools.
Neither kit replaces proper cleaning technique.
A $15 cleaning kit used aggressively can cause more damage than a $2 microfiber cloth used carefully.
What I Would Avoid Completely
No matter what earbuds or headphones you own, there are a few things I would not do unless the manufacturer specifically instructs otherwise.
Avoid:
- Soaking earbuds or headphones
- Spraying cleaners directly onto electronics
- Using pins or knives on speaker mesh
- Scrubbing aggressively
- Using abrasive cleaners
- Charging devices while they are still damp
- Putting wet ear tips back onto earbuds
- Closing damp earbuds inside a charging case
- Assuming water resistance means safe to wash
Water resistance is there to help protect against accidents and everyday exposure.
It is not permission to rinse electronics under the faucet.
Final Thoughts
Cleaning earbuds and headphones safely is mostly about restraint.
Start dry. Use a soft cloth and brush for routine dirt. Remove ear tips before cleaning them, keep moisture away from electronic openings, and let every part dry completely before putting things back together.
For over-ear headphones, pay extra attention to the ear cushions and headband because those surfaces collect most of the sweat and skin oil.
If you want an inexpensive tool mainly for earbuds and charging cases, the Hyashee Cleaner Kit is the simpler choice. Its compact three-in-one design covers the areas most people struggle to reach.
If you want something for earbuds, phone ports, speakers, and several other electronics, the STIKKI Cleaning Putty & Precision Tools kit makes more sense because it gives you more ways to deal with debris.
Either way, the tool matters less than how you use it.
A few minutes of gentle cleaning every couple of weeks is much safer than letting dirt build up and then trying to scrape everything out at once.