Connecting a laptop to your TV is usually much easier than it looks. If both devices have HDMI ports, one cable may be all you need. If your laptop only has USB-C, you can often use a USB-C to HDMI adapter or cable, as long as that port supports video output. You can also skip cables completely with Miracast, AirPlay, or Google Cast.
Affiliate Disclaimer
This website participates in affiliate programs. We may earn a commission
when you purchase products through links on this page, at no additional
cost to you. Our recommendations are based on independent research and
honest opinions.
The best method depends on what you are doing. HDMI is usually my first choice for movies, gaming, presentations, and anything where a stable picture matters. Wireless connections are more convenient when you simply want to share a browser tab, photos, or your laptop screen from across the room.
Start by Checking the Ports on Your Laptop and TV
Before ordering cables or adapters, look at the physical ports on both devices.
Most modern TVs have at least one full-size HDMI input. Depending on the TV, you may see labels such as HDMI 1, HDMI 2, ARC, or eARC next to them.
Your laptop may have:
- A full-size HDMI port
- USB-C
- Thunderbolt with a USB-C connector
- Mini DisplayPort on some older models
- Mini HDMI on a small number of computers
If your laptop and TV both have full-size HDMI, the setup is straightforward.
USB-C requires a little more attention because a USB-C connector does not automatically mean the port can output video. Some USB-C ports handle only data and charging.
Apple, for example, supports external displays through compatible USB-C and Thunderbolt ports on supported Macs, while Macs with built-in HDMI can connect directly using an HDMI cable.
The same basic principle applies to Windows laptops. Check the specifications for your exact model before buying a USB-C video adapter.
Method 1: Connect Your Laptop to the TV With HDMI
For most people, HDMI is still the simplest and most dependable way to connect a laptop to a television.
You only need an HDMI cable if both devices have standard HDMI ports.
Connect the HDMI Cable
Turn on your laptop and TV, then plug one end of the HDMI cable into the laptop and the other into an available HDMI port on the TV.
Use the TV remote to change the input to the HDMI port you just connected.
If you plugged the cable into HDMI 2, for example, select HDMI 2 from your television’s source or input menu.
Your laptop should usually recognize the TV automatically within a few seconds.
Choose What Appears on a Windows TV Screen
Windows gives you several ways to use a connected TV.
Press:
Windows key + P
You should see these options:
- PC screen only: Shows everything only on your laptop.
- Duplicate: Shows the same picture on the laptop and TV.
- Extend: Treats the TV as a second desktop.
- Second screen only: Turns off the laptop display and uses the TV.
Microsoft recommends the same Windows + P shortcut for choosing how content appears across connected displays.
For watching a movie, I often prefer Second screen only. For showing a presentation while keeping notes on the laptop, Extend can be far more useful.
Duplicate is easiest when you simply want everyone in the room to see exactly what is on your laptop.
How to Configure a TV on a Mac
A Mac should normally detect the TV after the HDMI connection is made.
Go to:
Apple menu > System Settings > Displays
From there, you can adjust the display arrangement, resolution, refresh rate, and whether the TV mirrors or extends your Mac desktop. Apple says supported Macs automatically detect a properly connected external display and provide these controls through Display settings.
If you have a MacBook with a built-in HDMI port, you can connect the cable directly.
If your Mac only has Thunderbolt or USB-C ports, you can use a compatible adapter to connect to HDMI. Apple specifically supports HDMI connections through compatible Thunderbolt and USB-C adapters on supported Macs.
Make Sure the TV Is Playing the Sound
HDMI normally carries both video and audio, so you should not need a second audio cable.
Windows often switches the sound output automatically. If the video appears on the TV but sound still comes from the laptop speakers, click the speaker icon in Windows and select the TV or HDMI audio device as the output.
On Mac, go to:
System Settings > Sound > Output
Then select your TV or HDMI device.
Apple specifically recommends checking the HDMI device under Sound Output if a Mac is connected to a TV, but audio is not playing through the television.
Method 2: Connect a USB-C Laptop to HDMI
A lot of thin laptops no longer include a dedicated HDMI port.
That does not necessarily stop you from connecting to a TV. A compatible USB-C or Thunderbolt port may output video through a USB-C to HDMI adapter, dock, or cable.
A typical setup looks like this:
Laptop USB-C port > USB-C to HDMI adapter > HDMI cable > TV
You can also buy a USB-C to HDMI cable that handles the conversion without a separate adapter.
The important part is confirming that your laptop’s USB-C port supports external video.
Not Every USB-C Port Supports a TV
This is probably the biggest source of confusion with USB-C connections.
Two laptops can have USB-C ports that look identical but support completely different features. One may handle charging, data, and external displays, while another may only support data.
Look for terms such as:
- DisplayPort Alt Mode
- Thunderbolt
- USB4
- External display support
- Video output
Your laptop manufacturer’s specifications are the safest place to check.
Do not assume an adapter is defective just because nothing appears when you connect it. If the USB-C port itself cannot output video, changing HDMI cables will not solve the problem.
Can USB-C Send 4K to a TV?
Yes, a compatible USB-C or Thunderbolt connection can output 4K, but every part of the connection matters.
The laptop has to support the resolution and refresh rate you want. The USB-C adapter or dock has to support it. The HDMI cable needs enough bandwidth, and the television’s HDMI input must also support that mode.
For example, connecting an HDMI cable capable of 4K at 120Hz does not automatically make a laptop output 4K at 120Hz.
Your laptop’s graphics hardware, output port, adapter, cable, and television all need to support the required format.
That distinction becomes important when shopping for newer HDMI cables.
4K, 8K and Refresh Rates Are a Chain
HDMI specifications can become confusing because cable listings often emphasize numbers such as 8K, 10K, 120Hz, 144Hz, or 240Hz.
For a normal laptop-to-TV setup, do not get too distracted by the biggest number.
An Ultra High Speed HDMI cable supports up to 48Gbps bandwidth and is designed for configurations including 4K at 120Hz and 8K at 60Hz.
But the cable is only one link in the chain.
If your laptop outputs 4K at 60Hz and your television accepts 4K at 60Hz, buying a cable capable of 8K at 60Hz will not suddenly give you 8K.
It simply gives you enough cable bandwidth for current and potentially future equipment.
Method 3: Connect a Windows Laptop Wirelessly With Miracast
If both your Windows laptop and TV support Miracast, you may be able to connect them without any cable at all.
Turn on the TV and make sure its screen mirroring or wireless display feature is enabled. The exact name varies between TV brands.
Then, on Windows, press:
Windows key + K
Windows will search for compatible wireless displays. Select your TV from the list and follow any instructions that appear.
Microsoft confirms that Windows 11 can connect wirelessly to TVs and other displays that support Miracast using Windows + K.
Once connected, Windows + P still lets you choose whether you want to duplicate or extend the desktop.
What if the TV Does Not Support Miracast?
Some televisions do not have Miracast built in.
Microsoft notes that a compatible Miracast adapter can be connected to an HDMI port on the TV when native Miracast support is unavailable.
Before buying an adapter, check the specifications of your television. Smart TVs sometimes support wireless screen sharing under brand-specific names rather than clearly calling it Miracast.
Method 4: Connect a Mac Wirelessly With AirPlay
If you have a Mac and an Apple TV or an AirPlay-compatible television, AirPlay is usually the easiest wireless method.
Your Mac and TV should generally be connected to the same network.
On a recent Mac:
- Open Control Center.
- Choose Screen Mirroring.
- Select your Apple TV or compatible television.
- Enter a code if your TV displays one.
Apple supports using AirPlay to mirror a Mac screen to an Apple TV and compatible displays.
This is handy when you are showing photos, a webpage, or a presentation and do not want a cable running across the room.
For gaming or situations where response time really matters, I would still prefer HDMI.
Method 5: Cast From Chrome to a TV
There is another wireless method worth knowing because it works across several laptop platforms.
If your television has Google Cast built in, or you have a Chromecast or compatible Google streaming device, Chrome can send a browser tab or your entire screen to the TV.
Make sure the laptop and Cast device are connected to the same Wi-Fi network.
In Chrome:
- Click the three-dot menu.
- Choose Cast, save, and share.
- Select Cast.
- Choose your TV or streaming device.
- Select whether you want to cast a tab or your entire screen.
Google says Chrome can cast either a browser tab or the computer’s entire screen to compatible Google Cast devices.
If you are streaming video from a supported website, casting the tab or using the site’s own Cast button can work better than mirroring the entire desktop.
Wired vs Wireless: Which Is Better?
Wireless sounds more convenient, and sometimes it absolutely is.
If you are sitting on the couch and want to show family photos or put a webpage on the TV, connecting wirelessly is hard to beat.
HDMI still has advantages, though.
A direct cable connection does not depend on Wi-Fi quality. It usually introduces less delay and is less likely to suffer from compression, temporary disconnections, or network congestion.
I generally prefer HDMI for:
- PC gaming
- Watching long movies from the laptop
- Presentations where reliability matters
- Using the TV as a second monitor
- High-resolution video
- High refresh rate output
I prefer wireless for casual screen sharing and situations where running a cable is inconvenient.
What to Do if the TV Says No Signal
A blank screen or No Signal message does not necessarily mean anything is broken.
Start with the obvious things.
Make sure the television is set to the correct HDMI input. Disconnect and reconnect both ends of the cable, then try another HDMI port on the TV.
On Windows, press Windows + P and choose Duplicate or Extend. Microsoft also recommends confirming cable connections and checking for Windows updates when an external display is not behaving correctly.
On a Mac, open Display settings. If the TV is still not detected, Apple recommends disconnecting and reconnecting the display and checking that you are using the correct cable and adapter.
If possible, test another HDMI cable. That is one of the easiest ways to separate a cable problem from a laptop or TV problem.
Why the Picture Looks Blurry or Does Not Fill the TV
A laptop and television may not always agree on resolution immediately.
Open your display settings and confirm that the TV is running at its recommended or native resolution.
For a 4K television, that is commonly 3840 x 2160. For a Full HD television, it is commonly 1920 x 1080.
Some televisions also apply overscan, which can cut off the edges of the computer desktop. Look through the TV’s picture settings for options such as:
- Screen Fit
- Just Scan
- Full Pixel
- 1:1
- PC Mode
- Fit to Screen
The exact name varies by manufacturer.
If text looks strange, also check whether your television has a dedicated PC input mode. Some TVs process an HDMI computer signal differently when the input is labeled as a PC.
When Buying a Better HDMI Cable Makes Sense
If you already own an HDMI cable that handles your laptop’s resolution reliably, there is no reason to replace it just because a newer cable has a larger number printed on the box.
A replacement makes more sense when the existing cable is damaged, too short, intermittently loses the picture, or does not support the bandwidth needed for a newer TV and laptop.
For higher-bandwidth setups, the HDMI organization specifies Ultra High Speed HDMI cables for configurations up to 48Gbps, including 4K at 120Hz and 8K at 60Hz.
The two cables below fit that kind of setup, but they make the most sense for slightly different physical arrangements.
1
Highwings 8K HDMI Cable: Best for a Typical Laptop-to-TV Setup

For a living room where the laptop is sitting on a coffee table, side table, or entertainment unit, the Highwings 8K 10K 4K HDMI Cable 6.6FT is the one I would look at first.
The 6.6-foot, or 2-meter, length gives you enough room to position a laptop comfortably without leaving a huge amount of extra cable on the floor.
Highwings lists the cable for up to 48Gbps bandwidth with support for 4K at 120Hz and 8K at 60Hz. It also lists HDR, HDCP 2.2 and 2.3 compatibility, and a braided outer construction.
For a normal 1080p or 4K laptop connection, that leaves plenty of bandwidth. It also gives you some room if you later connect a gaming laptop or another device that supports a higher refresh rate.
Your Amazon information showed a 4.7 out of 5 rating from about 45,400 reviews, with more than 10,000 purchased during the previous month. The supplied price was around $6.49, although Amazon pricing can change.
I would pick this cable mainly because of the practical 6.6-foot length. It is long enough for many living-room setups without becoming awkward.
The bigger numbers should not be the reason you buy it. A cable capable of 8K does not make a 4K laptop output 8K. It simply means the cable should not be the limiting part of a compatible connection.
If your laptop sits very close to the television, however, a slightly shorter cable can make the setup cleaner.
2
Ubluker 10K 8K HDMI Cable: Best for a Shorter High-Bandwidth Connection
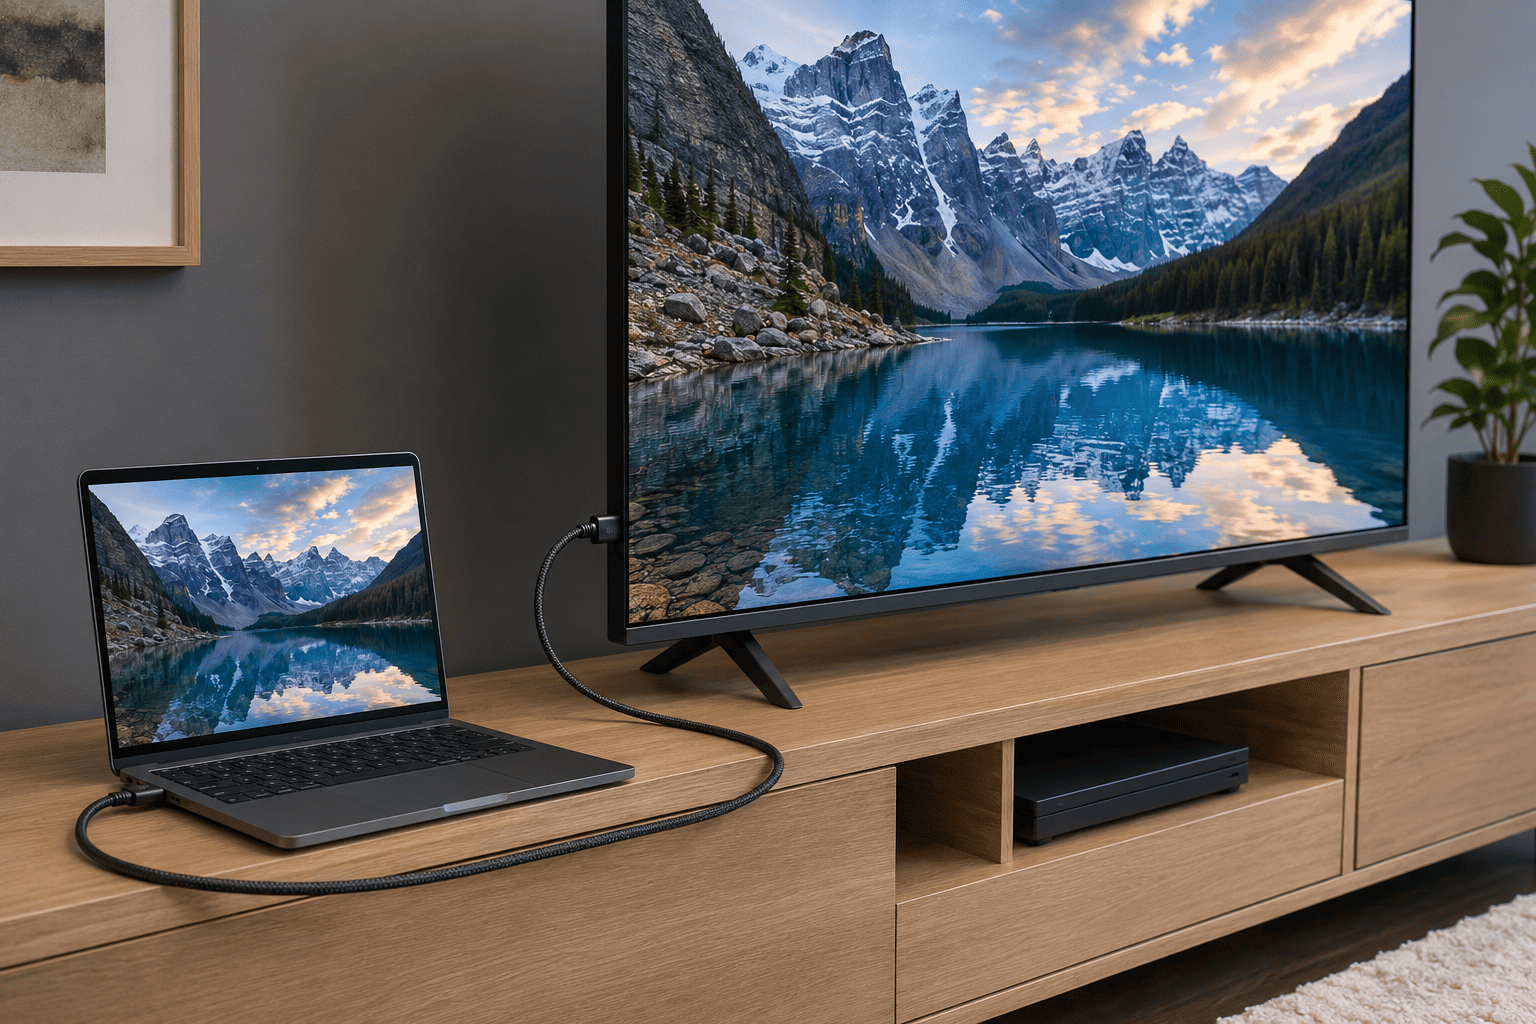
The Ubluker 10K 8K 4K HDMI to HDMI Cable 5FT makes more sense when your laptop, dock, or gaming PC sits fairly close to the TV.
At 5 feet, it gives you less excess cable to manage behind a desk or entertainment center.
The listing describes it as a certified Ultra High Speed cable with up to 48Gbps bandwidth and support for higher-resolution and high-refresh-rate configurations. It also lists eARC and HDCP 2.3 compatibility.
For a laptop-to-TV connection, the most useful part is not the advertised maximum resolution. It is having enough bandwidth for common demanding modes such as 4K at 120Hz when your laptop and television both support them.
The HDMI organization says certified Ultra High Speed cables are designed for up to 48Gbps and formats including 4K at 120Hz and 8K at 60Hz.
According to the Amazon details you provided, this Ubluker cable had a 4.7 out of 5 rating from about 35,400 reviews. The listed price was around $7.51, compared with a stated list price of $8.99.
I would choose it over the Highwings mainly when five feet is a better physical fit or when I wanted a short cable for a gaming laptop, desktop replacement laptop, or dock located right beside the television.
For an ordinary 1080p movie connection, both cables are more capable than necessary. That is fine, especially at these prices, but you should still buy based on length and your equipment rather than the largest resolution printed in the title.
What to Check Before Buying an HDMI Cable or Adapter
You do not need to become an HDMI expert to connect a laptop to a television, but a few checks can prevent wasted money.
Measure the distance first
A cable that is six inches too short is useless.
Think about where the laptop will actually sit while connected. Leave enough slack that the cable does not pull against the laptop’s HDMI port.
Check your laptop’s maximum output
Look up your exact laptop model.
If the computer only outputs 4K at 60Hz, a cable rated for 4K at 120Hz is still compatible, but it cannot make the graphics hardware produce a higher refresh rate.
Check the TV input
Televisions with several HDMI ports do not always give every port identical capabilities.
Some TVs reserve their highest refresh rates or gaming features for specific HDMI inputs.
If you are trying to get 4K at 120Hz, check the television manual and use the appropriate port.
Include the adapter in your calculations
If your laptop uses USB-C to HDMI, the adapter can become the bottleneck.
A 48Gbps HDMI cable does not help if your USB-C adapter tops out at 4K 30Hz.
Read the adapter specifications as carefully as you read the cable specifications.
Do not pay for specifications you cannot use
For simply showing slides or watching 1080p movies, an expensive high-bandwidth cable offers little practical benefit over a reliable cable that already meets the required format.
Higher capability makes more sense if you own a 4K 120Hz television, have a compatible gaming laptop, or expect to reuse the cable with newer equipment.
Final Thoughts
Connecting a laptop to a TV usually comes down to three choices.
Use HDMI when you want the simplest, most reliable connection with video and audio through one cable. If your laptop lacks HDMI but has compatible USB-C or Thunderbolt video output, use a USB-C to HDMI adapter or cable.
For a cable-free setup, Windows laptops can connect to compatible Miracast displays with Windows + K, Macs can use AirPlay, and Chrome can cast tabs or the entire screen to compatible Google Cast devices.
For movies, gaming, and long sessions, I would still choose a wired HDMI connection whenever it is practical.
If you need a new cable, the Highwings 6.6FT HDMI cable is the better fit for a typical laptop-to-TV setup where a little extra reach is useful. The Ubluker 5FT HDMI cable makes more sense when your laptop or dock sits closer to the television, and you want a shorter high-bandwidth cable.
Most importantly, remember that the cable does not determine the picture quality by itself. Your laptop, output port, USB-C adapter if you use one, HDMI cable, and TV all have to support the resolution and refresh rate you want.