Backing up your iPhone is one of those things that feels unnecessary until the day your phone is lost, damaged, stolen, or suddenly refuses to turn on. A good backup gives you a way to recover your important information instead of starting from scratch.
Affiliate Disclaimer
This website participates in affiliate programs. We may earn a commission
when you purchase products through links on this page, at no additional
cost to you. Our recommendations are based on independent research and
honest opinions.
In 2026, you have three main ways to back up an iPhone: iCloud, a Mac using Finder, or a Windows PC using the Apple Devices app or, on older systems, iTunes. Each method works differently, and you do not have to choose only one.
For most people, iCloud is the easiest option because it can happen automatically. If you want a local copy that lives on your computer, a Mac or PC backup gives you another layer of protection.
Why Should You Back Up Your iPhone?
Your iPhone contains far more than photos and phone numbers.
Over time, it can hold messages, app data, device settings, account information, photos, videos, documents, and other information that would be difficult or impossible to recreate manually.
A backup gives you a copy of that information that can be used when you replace your iPhone, lose it, damage it, or need to restore it.
Apple specifically recommends backing up because it gives you a copy of your information if your device is replaced, lost, or damaged.
The important part is making the backup before something goes wrong.
iCloud vs. Computer Backup
The biggest difference is where your backup is stored.
With iCloud, the backup is stored in Apple’s cloud. With a Mac or Windows PC, the backup is stored locally on your computer.
Apple also allows you to use both methods. In fact, having an iCloud backup and a separate computer backup can give you an extra layer of protection.
Here’s the practical difference:
- iCloud: Convenient and automatic
- Mac: Local backup with more control
- Windows PC: Local backup without needing a Mac
- Encrypted computer backup: Adds protection and can include additional information
- Both iCloud and computer: Best if your data is especially important
There is no reason to make this more complicated than it needs to be. Pick the method that fits how you actually use your devices.
How to Back Up Your iPhone to iCloud
For most people, iCloud is the easiest starting point.
You don’t need to connect your iPhone to a computer every time. Once iCloud Backup is enabled, your iPhone can automatically back up when the right conditions are met.
To turn it on, open:
Settings > [your name] > iCloud > iCloud Backup
Turn on Back Up This iPhone.
You can also choose Back Up Now to create a backup immediately.
Apple’s current backup guidance lists iCloud as one of the primary backup methods alongside Mac and PC backups.
What Does iCloud Backup Need?
For automatic iCloud backups, your iPhone generally needs to be connected to Wi-Fi, connected to power, and have the screen locked.
That makes overnight backups particularly convenient.
You do not need to remember to manually press a button every night.
The bigger thing to watch is storage.
Your iPhone may contain hundreds of gigabytes of photos and videos, while your available iCloud storage may be much smaller. Remember that iCloud storage is also used by other iCloud services, so you need enough available space for the backup.
How to Check Your iCloud Backup
Don’t assume a backup is working just because the feature is enabled.
Go to:
Settings > [your name] > iCloud > iCloud Backup
You can see information about your backup and when the latest backup was completed.
Apple also provides options for viewing and managing device backups from an iPhone, Mac, or Windows PC.
This is worth checking occasionally.
If your last successful backup happened months ago, you have a problem even though the setting is technically turned on.
What If iCloud Says You Don’t Have Enough Storage?
This is one of the most common problems.
You have a few choices.
First, check what’s using your iCloud storage. You may have old device backups, large photo libraries, or other data taking up space.
You can also reduce what is included in an iCloud device backup where appropriate.
If you still don’t have enough room, you can increase your iCloud storage plan.
Or you can use a Mac or Windows PC for a local backup instead.
There is no rule saying you must pay for more cloud storage if you would rather maintain local backups.
How to Back Up Your iPhone to a Mac
If you have a Mac, Apple now uses Finder for iPhone backups on macOS Catalina 10.15 and later.
Connect your iPhone to the Mac using a cable.
Then:
- Open Finder
- Select your iPhone from the sidebar
- Trust the computer if prompted
- Select the General tab
- Choose Back up all of the data on your iPhone to this Mac
- Select Encrypt local backup if you want an encrypted backup
- Create and confirm your backup password
- Click Back Up Now
Apple’s current Mac instructions confirm that Finder is used for backups on macOS Catalina 10.15 and later.
Once the backup finishes, Finder shows the date and time of the latest backup.
Why Encrypt Your Local iPhone Backup?
This is an important setting that is easy to overlook.
A normal local backup is not encrypted by default.
When you select Encrypt local backup, your backup is protected with a password and can contain information that an unencrypted computer backup does not, including saved passwords, Wi-Fi settings, website history, Health data, and call history.
If you use a computer backup, I would strongly consider encryption.
There is one important catch: do not lose the password.
Apple states that you cannot use previous encrypted backups without that password.
Store it somewhere secure where you can retrieve it later.
How to Back Up Your iPhone to Windows
You don’t need a Mac to make a local iPhone backup.
On current Windows systems, Apple uses the Apple Devices app.
Connect your iPhone to your PC and open Apple Devices.
Then select your iPhone and choose the backup options under the General section.
You can select the option to back up all of your iPhone’s data to the computer and then choose Back Up Now.
If you want an encrypted backup, select Encrypt local backup and create a password. Apple’s current Windows instructions also recommend encryption if you want to preserve Health and Activity data.
What Happened to iTunes?
If you remember backing up an iPhone through iTunes, you’re not imagining things.
iTunes was historically the main way to manage iPhones from a computer.
On modern Windows systems, Apple now directs you to the Apple Devices app. On Macs running macOS Catalina or newer, Finder handles iPhone backups.
iTunes is still relevant for older setups, including Windows systems where the Apple Devices app isn’t being used and Macs running macOS Mojave or earlier.
So if an older tutorial tells you to use iTunes, don’t assume the instructions are wrong. They may simply be written for an older operating system.
Which Backup Method Is Better?
There isn’t one answer for everyone.
If you want the easiest setup, use iCloud.
If you have a Mac and plenty of storage, a local encrypted backup is excellent.
If you use Windows, the Apple Devices app gives you the local backup option without needing Apple hardware.
And if your data is extremely important, use both.
That’s the approach I prefer because it avoids putting all your trust in one backup location.
If your iPhone disappears and your computer is at home, you still have iCloud.
If you lose access to your iCloud account or run out of cloud storage, you still have your local computer backup.
What Does an iPhone Backup Actually Save?
This is where things can get confusing because an iCloud backup is not simply a complete copy of everything visible on your iPhone.
Some information is already synchronized through iCloud rather than being included in the device backup in the same way.
Your backup also depends on which services you have enabled.
For example, if your photos are already being synchronized with iCloud Photos, they are handled through that service rather than being duplicated inside the device backup.
The same basic principle applies to other information already stored and synchronized through Apple’s cloud services.
So don’t think of an iCloud device backup as a giant ZIP file containing every single thing on your phone.
It is better understood as a way to preserve the device’s data and settings that need to be restored.
Can You Back Up Photos Separately?
Yes, and for many people this is a good idea.
Photos and videos are often the most valuable files on an iPhone, and they can also consume a huge amount of storage.
If you use iCloud Photos, your photo library is synchronized through iCloud.
You can also transfer photos to a Mac or PC and maintain another copy.
For especially important photos, having another copy outside your iPhone is a smart habit.
A backup should not be the only place your irreplaceable memories exist.
What If Your iPhone Is Almost Full?
A full iPhone can make backups more annoying because you may not have enough room for new photos, videos, app data, or temporary files.
Before making a major backup, check:
Settings > General > iPhone Storage
Look at what is consuming your space.
You may find that old videos, downloaded media, large apps, or message attachments are responsible.
Cleaning up unnecessary files can make the phone easier to manage and may also make your overall backup routine simpler.
How Often Should You Back Up Your iPhone?
If you use iCloud Backup, I recommend leaving automatic backups enabled rather than trying to remember a schedule.
For a computer backup, a regular routine makes sense.
Once a week is reasonable for someone who frequently creates important files or takes lots of photos.
If your phone contains particularly important work or personal information, backing up more frequently is sensible.
The key is consistency.
A six-month-old backup is better than nothing, but it may still leave you without your most recent photos, messages, or other changes.
Keep Your Backup Accessories Organized
There is also a physical side to maintaining a computer-based backup system.
If you regularly move your iPhone between a charging cable, Mac, PC, external storage, and other accessories, keeping those cables and adapters together saves a surprising amount of frustration.
That’s where a simple tech organizer can make sense.
It does not improve the actual backup itself, but it can make the physical process of maintaining your devices much easier.
1
FYY Electronic Organizer: A Simple Way to Keep Backup Gear Together
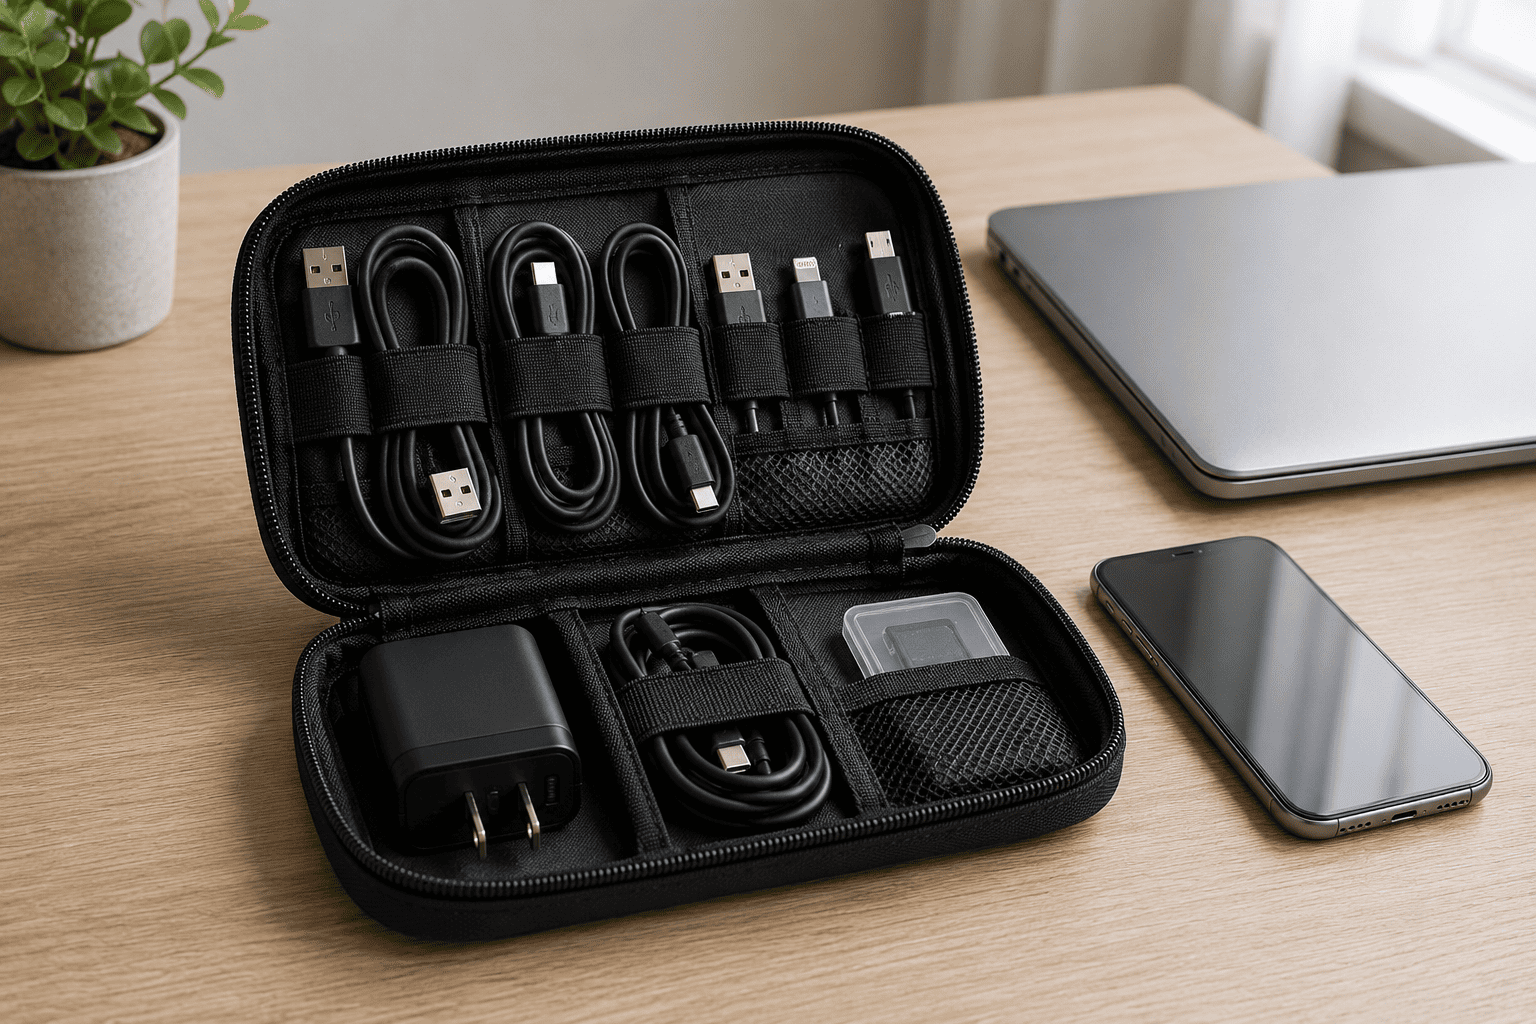
The FYY Electronic Organizer is a small travel organizer designed for carrying cables, chargers, adapters, and other electronic accessories.
The supplied listing describes a medium-sized, black organizer with two layers, a wrist strap, and a water-resistant design.
For an iPhone backup setup, its usefulness is pretty straightforward.
You can keep the charging or data cable, spare adapters, small memory accessories, and other device gear in one place instead of hunting through drawers whenever you need to connect your iPhone to a computer.
At the supplied price of about $11.99, it is inexpensive enough to make sense as an organizational accessory rather than something you need to carefully justify.
Just remember what you’re buying it for.
It is not a backup drive, and it does not back up your iPhone.
Its job is simply to keep the physical accessories you use for your devices together and easier to carry.
2
SZHAIYIJIN SD Card Reader: Useful for Moving Files Manually
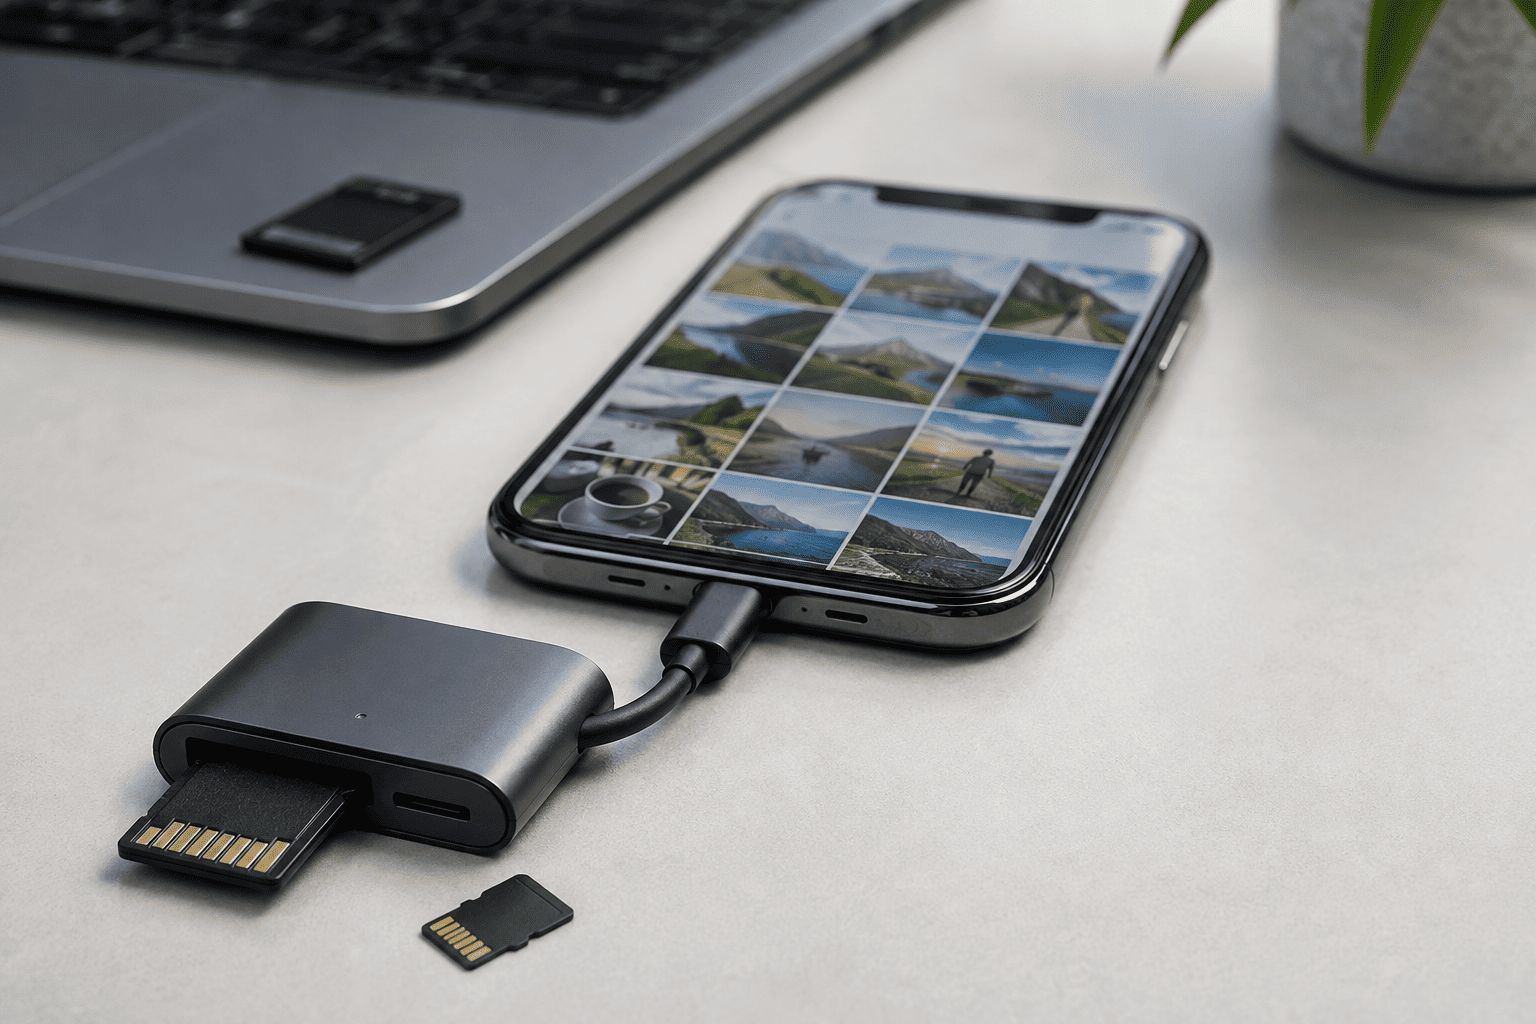
The SZHAIYIJIN SD Card Reader for iPhone takes a different approach.
The listing describes an SD and TF/microSD card reader designed to connect to compatible iPhones and iPads and access files stored on memory cards without requiring a separate app.
This can be useful if you regularly work with cameras, SD cards, or removable storage and want to move photos and other files directly between your iPhone and a memory card.
There is an important distinction here, though.
An SD card reader is not the same thing as an iPhone device backup.
You cannot simply connect this reader and assume your entire iPhone has been backed up. It is better suited to manually transferring or accessing specific files, particularly photos and videos.
At the supplied price of around $9.99, it is a low-cost accessory for someone who already works with SD or microSD cards.
If your only goal is creating a complete iPhone backup, stick with iCloud, Finder, or Apple Devices.
If you frequently move files between an iPhone and memory cards, this type of adapter becomes considerably more useful.
How to Know Your Backup Actually Worked
The worst time to discover a backup failed is when you desperately need it.
After making a backup, check its date.
For iCloud, go to the iCloud Backup settings and verify the latest backup information.
For a Mac, Finder shows the latest backup date.
For Windows, Apple Devices and iTunes provide information about the most recent backup.
If you’re using an encrypted local backup, also make sure you know the password.
A backup you cannot restore is not much help.
What Should You Do Before Replacing Your iPhone?
Before trading in, selling, or replacing an iPhone, make sure your current data is safely backed up.
Ideally, create a fresh backup shortly before you move to the new device.
Then verify that the backup completed.
When restoring to a new iPhone, you can use the appropriate backup during setup. Apple also supports restoring from a Mac or PC backup when transferring to a new device.
Don’t erase your old phone immediately after starting the transfer.
Give yourself time to verify that the important information has actually made it to the new device.
The Backup Strategy I’d Use
If this were my iPhone, I’d keep it simple.
I’d enable automatic iCloud Backup for everyday protection.
I’d also make an encrypted local backup to my Mac or Windows PC from time to time, particularly before a major iOS update, device replacement, or repair.
For important photos and documents, I’d keep additional copies rather than trusting a single location.
That gives you multiple ways to recover your information without turning backups into a full-time job.
Final Thoughts
Backing up your iPhone does not need to be complicated.
iCloud is the easiest option for automatic, hands-off backups. A Mac gives you a local backup through Finder, while Windows PCs can use Apple’s Apple Devices app. iTunes still applies to some older systems.
If you make a computer backup, I would strongly consider enabling encryption, especially if you want Health data, saved passwords, and other additional information included. Just make sure you keep the encryption password somewhere safe because Apple cannot recover it for you.
For most people, the best setup is not choosing between iCloud and a computer.
It’s using iCloud for convenient automatic protection and keeping an occasional encrypted local backup as a second copy.
The FYY organizer can help keep your cables and accessories together, while the SZHAIYIJIN SD card reader is useful for manually moving files between compatible iPhones and memory cards.
Neither replaces an actual iPhone backup.
The important thing is to create the backup before you need it. Once your iPhone is lost, damaged, or unable to start, it is too late to wish you had one.