Low FPS does not always mean you need a new graphics card. In many PC games, a few graphics and Windows settings can recover a surprising amount of performance without making the game look terrible.
Affiliate Disclaimer
This website participates in affiliate programs. We may earn a commission
when you purchase products through links on this page, at no additional
cost to you. Our recommendations are based on independent research and
honest opinions.
The trick is knowing which settings actually cost frames. Dropping everything to Low usually works, but it also throws away visual quality you could have kept. I would rather change the expensive settings first, test the game, and stop once performance feels right.
Before buying new hardware, work through these 10 settings. Most take less than a minute to change, and several can make an immediate difference.
First, Figure Out What Is Limiting Your FPS
FPS, or frames per second, tells you how many individual images your PC renders every second. Higher FPS usually makes movement feel smoother, and controls feel more responsive, especially on a high-refresh-rate monitor.
Your graphics card is often the main limitation, particularly at 1440p or 4K with high graphics settings. But the CPU, RAM, background programs, VRAM capacity, cooling, and even the game itself can also hold performance back.
That is why there is no single “best FPS setting.”
If your GPU is already sitting close to 100% usage, reducing graphics settings will usually help. If GPU usage is much lower while one or more CPU cores are heavily loaded, lowering GPU-heavy effects may not change much.
Still, the following settings are where I would start.
1. Lower the Render Resolution Before Dropping Everything Else
Resolution has one of the largest effects on GPU workload because the graphics card has to render every pixel you see.
A 4K image contains far more pixels than 1440p, while 1440p requires considerably more work than 1080p. If your GPU is struggling, lowering resolution can immediately raise FPS.
I would not necessarily change your monitor’s desktop resolution. Instead, look inside the game’s graphics menu for settings such as:
- Render Resolution
- Resolution Scale
- Internal Resolution
- Screen Percentage
If the game allows it, try reducing the render scale to around 90% first. If performance is still poor, move toward 80% and compare image quality.
Do not automatically jump to 50%. At that point, the image can become noticeably soft unless a good upscaler is handling the reconstruction.
2. Turn On DLSS, FSR, or the Game’s Upscaling Option
Modern upscaling is one of the first settings I check in demanding games.
Instead of rendering every frame at the monitor’s full native resolution, technologies such as NVIDIA DLSS and AMD FSR can render at a lower internal resolution and reconstruct the final image. The GPU has less work to do, which can raise frame rates significantly in supported games.
NVIDIA’s current DLSS family includes Super Resolution and, on supported RTX hardware, Frame Generation technologies. AMD’s current FSR technologies likewise include upscaling and frame-generation options across supported Radeon hardware.
If your game offers several presets, I would normally start with:
- Quality for the best balance
- Balanced when you need more FPS
- Performance when native rendering is simply too demanding
At 1080p, aggressive upscaling can sometimes look noticeably softer. At 1440p and especially 4K, Quality mode can be much easier to live with.
Frame Generation is different from normal upscaling. It creates additional frames between traditionally rendered frames, so the FPS counter can rise dramatically. It can make motion look smoother, but it does not magically remove every form of input latency.
For competitive games, I care more about strong native or upscaled base performance than chasing the biggest displayed FPS number.
3. Reduce or Disable Ray Tracing
Ray tracing can produce excellent lighting, reflections, and shadows, but it is also one of the easiest settings to turn down when FPS matters more than visual effects.
Games may separate ray tracing into several controls, including:
- Ray-traced reflections
- Ray-traced shadows
- Ray-traced global illumination
- Path tracing
- Ray-traced ambient occlusion
You do not always have to disable everything.
If a game has separate ray-tracing settings, try turning reflections or lighting down one level before switching the entire feature off. That can preserve some of the effect while freeing up GPU performance.
Path tracing is particularly demanding. If you’re running it on hardware that struggles to maintain your target frame rate, switching back to conventional ray tracing or normal rasterized lighting is usually the first move I would make.
4. Drop Shadow Quality One Level
Ultra shadows are rarely where I want to spend a large chunk of my GPU budget.
Higher shadow settings can increase shadow-map resolution, extend the distance at which shadows are drawn, and add more detailed shadows to small objects. The visual difference between High and Ultra can be surprisingly small while you’re actually playing.
Try moving shadow quality from Ultra to High.
If you still need performance, go from High to Medium. I usually avoid Low unless the game remains difficult to run because very low shadow settings can make scenes look flat.
This is one of those settings where a small visual compromise can be easier to accept than lowering every texture and geometry option at once.
5. Lower Volumetric Effects, Fog, and Clouds
Volumetric effects create things such as realistic fog, clouds, smoke, light shafts, and atmospheric lighting.
They can look fantastic.
They can also be expensive.
Games with large outdoor environments sometimes spend a substantial part of their graphics workload rendering clouds and volumetric lighting that you barely notice while moving quickly through the world.
Look for settings called:
- Volumetric Quality
- Volumetric Fog
- Cloud Quality
- Lighting Quality
- Fog Quality
I normally reduce these from Ultra to High or Medium before touching textures.
You can often gain performance while keeping the overall character of the scene intact.
6. Turn Down Reflections and Screen-Space Effects
Reflections are another setting that can quietly consume GPU resources.
Depending on the game, you may see controls for screen-space reflections, reflection quality, water reflections, mirror quality, or separate ray-traced reflections.
Screen-space reflections work with information that is already visible on the screen. They are generally less demanding than full ray tracing, but high reflection settings can still cost performance in environments filled with glass, water, shiny floors, or metallic surfaces.
Try reducing Reflection Quality by one step.
Ambient occlusion is another setting worth testing. SSAO, HBAO, GTAO, and similar methods add contact shadows around corners and objects, helping scenes feel less flat.
I usually keep some form of ambient occlusion enabled because turning it completely off can noticeably hurt image depth. Medium or High is often a better compromise than Ultra.
7. Adjust View Distance, Crowd Density, and Object Detail
Not every FPS problem comes from the GPU.
Open-world games, racing titles, simulations, strategy games, and busy city environments can put serious pressure on the CPU. The processor may have to manage physics, AI characters, traffic, draw calls, and hundreds of objects before the graphics card even finishes the frame.
That is where settings such as these become useful:
- View Distance
- Crowd Density
- Traffic Density
- Object Detail
- Level of Detail
- Simulation Quality
- Environment Detail
If your FPS drops badly in cities or crowded locations but improves indoors, these are worth testing.
Reducing crowd density from Ultra to High or Medium can sometimes help more than lowering texture quality because you’re reducing the amount of work being sent through the rest of the system.
I would especially check these settings if your GPU usage is not consistently near its limit.
8. Be Careful With Texture Quality
Texture quality gets blamed for low FPS far more often than it deserves.
Textures mostly consume graphics memory, or VRAM. If your GPU has enough VRAM for the setting you’re using, dropping textures from High to Medium may produce little or no meaningful FPS improvement.
The situation changes once VRAM fills up.
Then you may see:
- Sudden stutters
- Slow texture loading
- Severe frame-time spikes
- Blurry textures appearing temporarily
- Performance dropping as you move through new areas
If you have an 8 GB graphics card and a modern game reports that Ultra textures require considerably more VRAM, move down to High.
But if your VRAM usage is comfortably below the limit, I would leave textures alone and reduce shadows, reflections, volumetrics, or ray tracing first.
Good textures contribute a lot to image quality without always carrying a huge rendering cost.
9. Check V-Sync, Frame Caps, and Refresh Rate
Sometimes your PC is producing more performance than you’re actually seeing.
Suppose you have a 144 Hz monitor but Windows or the game is running it at 60 Hz. Even if the GPU is rendering 150 FPS, the display configuration can prevent you from getting the experience you expected.
Check the refresh rate in Windows and your game.
You should also look at V-Sync and any frame-rate limit.
V-Sync helps prevent visible tearing by synchronizing frame delivery with the display, but depending on the game and setup, it can affect latency or limit FPS. Variable-refresh-rate technologies such as NVIDIA G-SYNC and AMD FreeSync can give you another way to keep motion smooth on compatible hardware.
A frame cap can actually be useful.
If your PC fluctuates constantly between 120 and 180 FPS, limiting the game to a stable value can improve frame pacing, reduce heat, and keep the GPU from working unnecessarily hard.
Just make sure you did not accidentally leave a 60 FPS cap enabled when you’re trying to reach 120 or 144 FPS.
10. Turn On Windows 11 Optimizations for Windowed Games
If you play games in borderless windowed mode, Windows 11 has a setting worth checking.
Go to:
Settings > System > Display > Graphics
Then look for Optimizations for windowed games.
Microsoft says this feature improves performance for compatible DirectX 10 and DirectX 11 games running in windowed and borderless windowed modes. It moves compatible games to a newer presentation model that can reduce frame latency and enable features such as variable refresh rate.
After changing the setting, restart the game.
I would not expect it to suddenly double your FPS, but this is exactly the kind of free system-side change worth enabling before you spend money on hardware.
Change Settings in the Right Order
If you do not want to spend an hour tweaking menus, use a simple order.
I would start here:
- Enable DLSS, FSR, or another good upscaler
- Reduce or disable ray tracing
- Lower shadows
- Lower volumetric effects
- Reduce reflections
- Reduce view distance or crowd density if CPU-limited
- Lower render resolution slightly
- Reduce textures only if VRAM is becoming a problem
- Check V-Sync, FPS caps, and monitor refresh rate
- Check Windows gaming settings
Change one or two things, play the same demanding section of the game, and compare.
That gives you a much clearer idea of what is actually helping.
What If Changing Graphics Settings Barely Helps?
This is the point where I start looking beyond the graphics menu.
If lowering a game from Ultra to Medium barely changes FPS, the graphics card might not be the main limitation. Your CPU could be holding the game back, your system could be running out of RAM, or the memory configuration itself may be hurting performance.
Modern gaming PCs also tend to have several things running at once.
You may have Discord open, a browser with 20 tabs, game launchers, RGB software, recording software, antivirus processes, and Windows services all competing for memory.
A game that technically runs with 16 GB of RAM can behave very differently when the rest of the system is already using a large part of it.
That does not mean buying faster RAM automatically fixes low FPS. But if your system is short on memory, running a single stick, or using slow memory with a CPU-sensitive game, RAM deserves a closer look.
Why 32 GB of RAM Makes Sense for Many Gaming PCs
For a gaming-only machine, capacity and memory speed affect different things.
More capacity mainly gives the game and everything around it more breathing room. Faster memory increases bandwidth and can affect CPU-side gaming performance, depending on the processor, motherboard, game, and graphics settings.
I would not upgrade from a good 16 GB kit to 32 GB just because somebody promised a huge average-FPS increase.
I’d consider 32 GB because it is comfortable for modern multitasking, demanding games, mods, background apps, content creation, and keeping the system from leaning too heavily on slower storage when memory fills up.
If your current machine uses DDR4, the following kit fits that type of platform.
1
CORSAIR Vengeance LPX 32GB DDR4-3200: A Practical Upgrade for DDR4 Gaming PCs
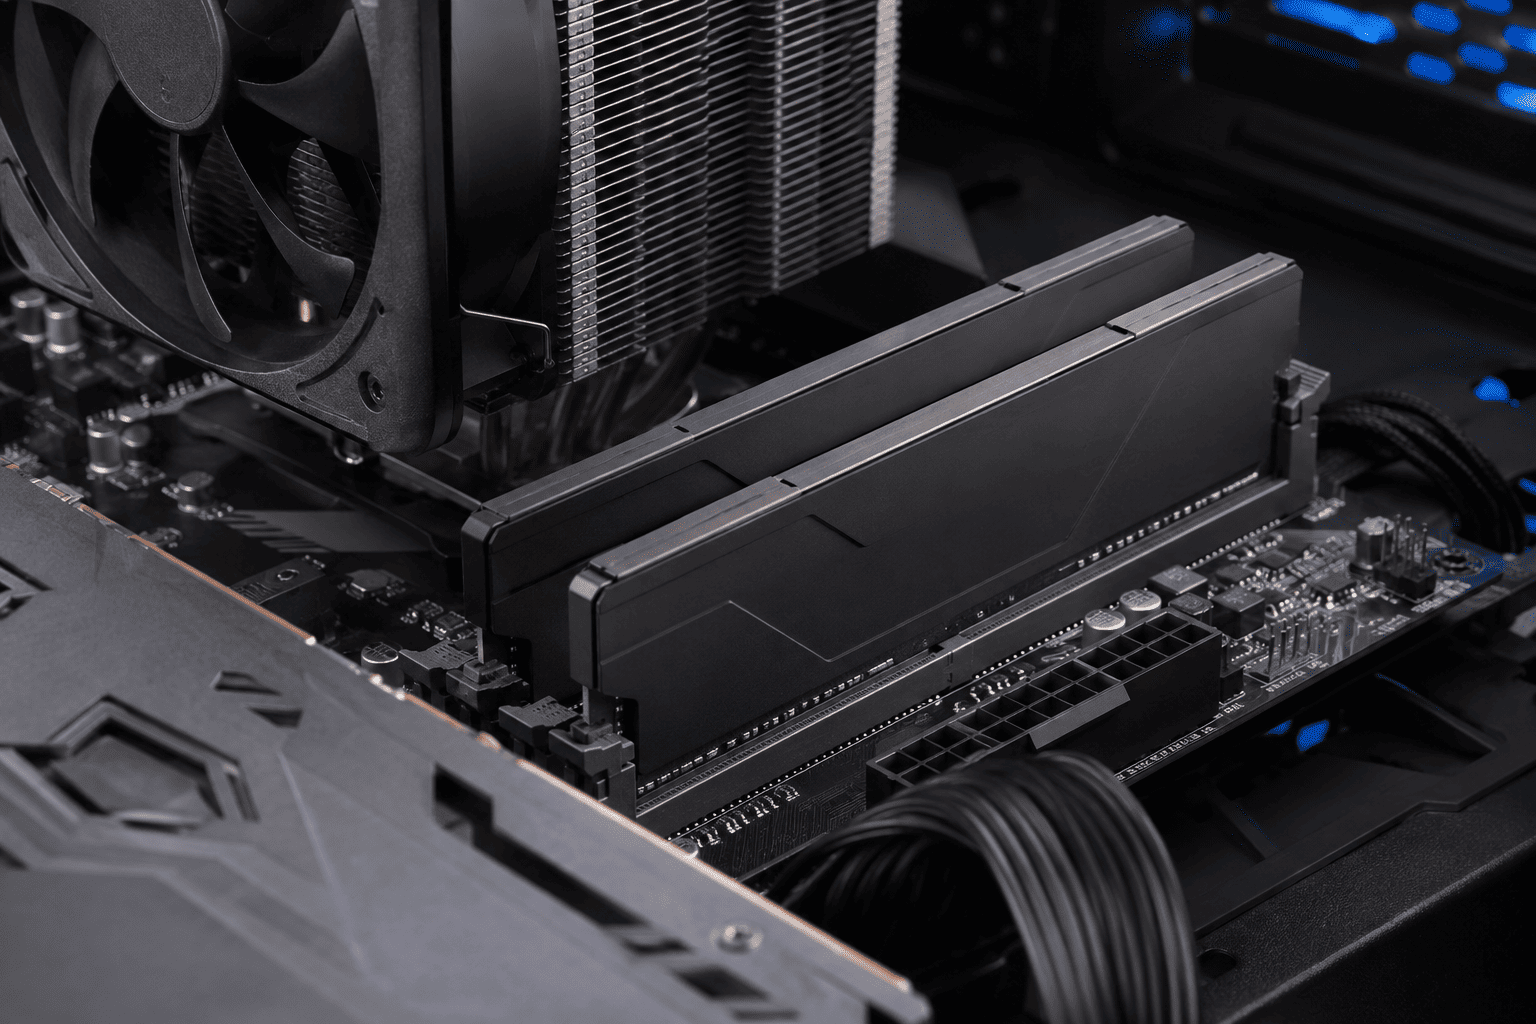
The CORSAIR Vengeance LPX 32GB DDR4-3200 kit is the one I’d look at if you already have a compatible DDR4 desktop and want to move to a comfortable 32 GB configuration.
It uses two 16 GB modules, which means you can run a dual-channel configuration on compatible systems rather than relying on one large stick. The kit is rated for up to DDR4-3200 with CL16 timings, although Corsair notes that reaching the advertised tested speed requires the appropriate BIOS memory profile or adjustments, and final performance depends on the CPU and motherboard.
The low-profile heat spreaders are another practical advantage. Tall RGB memory can interfere with some large air coolers, while the LPX design keeps things fairly compact.
Would this take a game from 60 FPS to 120 FPS by itself? Probably not.
The better reason to buy it is if you’re currently stuck with 8 GB, running a mismatched memory setup, using one memory module, or regularly running out of RAM while gaming and multitasking. In those situations, moving to a proper 32 GB dual-module kit can make the whole PC feel healthier and may improve frame-time consistency.
The supplied Amazon listing shows it around $231, so I would still compare current DDR4 pricing before buying. RAM prices can move around quite a bit.
There is one important compatibility rule: DDR4 memory only works in DDR4-compatible motherboards. You cannot install this kit in a DDR5 slot.
What If You’re Building on a DDR5 Platform?
This is where the choice becomes completely different.
DDR5 is not simply a faster version of the same stick that you can drop into an older DDR4 board. The physical and electrical standards are different, so your motherboard determines which memory generation you can use.
If you have a modern DDR5-compatible gaming platform, then it makes more sense to shop within DDR5 rather than buy DDR4 simply because the capacity is the same.
That brings us to the faster kit.
2
CORSAIR Vengeance RGB 32GB DDR5-6000 CL30: Better for a Modern DDR5 Build

The CORSAIR Vengeance RGB 32GB DDR5-6000 CL30 kit makes more sense if your PC is already built around a DDR5-compatible CPU and motherboard.
This is another 32 GB kit made from two 16 GB modules, but it is rated for up to 6000 MT/s with CL30-36-36-76 timings. Corsair lists support for both AMD EXPO and Intel XMP memory profiles, although the company again notes that reaching the advertised tested speed requires the appropriate BIOS configuration and depends on your system components.
That makes this much more relevant to a current gaming build than to someone trying to squeeze another year out of an older DDR4 PC.
Fast DDR5 can matter most in CPU-limited scenarios, where the processor and memory subsystem are feeding frames to a powerful GPU as quickly as possible. Think competitive games running at high frame rates or lower resolutions rather than a 4K game where the GPU is already completely saturated.
The RGB lighting is part of the package too, although I would treat that as appearance rather than performance.
At the supplied listing price of about $550, this particular kit is expensive enough that I would absolutely compare current pricing and motherboard compatibility before ordering. Corsair’s own current product listing also shows that advertised 6000 MT/s operation depends on compatible hardware and memory-profile settings.
Most importantly, do not buy this DDR5 kit for a DDR4 motherboard. It will not fit or work.
Before Buying RAM, Check These Four Things
RAM is one of the easier PC upgrades, but compatibility matters.
Before ordering any kit, check:
- Whether your motherboard uses DDR4 or DDR5
- The memory speeds officially supported by your CPU and motherboard
- Whether XMP or EXPO is available in your BIOS
- Whether your CPU cooler leaves enough physical room above the RAM slots
I would also avoid mixing random memory kits if you can help it.
Two kits with similar specifications are not automatically guaranteed to behave identically together. A matched kit gives you a simpler starting point.
After installation, check your BIOS as well. Fast memory can run at a slower default speed until the correct XMP or EXPO profile is enabled.
Final Thoughts
If your PC games are running poorly, I would not start by ordering hardware.
Turn on a good upscaler first. Reduce ray tracing, shadows, volumetric effects, and reflections. Check render resolution, crowd settings, frame caps, refresh rate, and Windows graphics options. Those changes cost nothing, and they’re much more likely to improve FPS when your graphics card is the limiting factor.
Only start looking at RAM when the evidence points there.
For an existing DDR4 gaming PC that needs more memory, the CORSAIR Vengeance LPX 32GB DDR4-3200 kit is the more sensible of these two choices. For a modern DDR5 system, the CORSAIR Vengeance RGB 32GB DDR5-6000 CL30 kit is the appropriate option and gives you substantially higher memory bandwidth on compatible hardware.
Neither kit is a magic FPS button.
Get the game settings right first. Then upgrade the part of your PC that is actually holding those frames back.