Google Photos can do much more than hold pictures from your phone. Once it is set up properly, it can automatically back up your photos and videos, help you find an old picture in seconds, group related memories into albums, handle everyday photo editing, and even free up storage on your phone.
Affiliate Disclaimer
This website participates in affiliate programs. We may earn a commission
when you purchase products through links on this page, at no additional
cost to you. Our recommendations are based on independent research and
honest opinions.
The important part is understanding how those features fit together. Backup protects your pictures, organization makes a large library manageable, and editing lets you improve photos without moving them into another app. In this guide, I’ll walk through each part so you can set up Google Photos in a way that actually makes your photo library easier to live with.
What Google Photos Actually Does
Think of Google Photos as a combination of cloud backup, searchable photo library, organizer, and basic photo editor.
When Backup is turned on, supported photos and videos from your phone can be saved to your Google Account. Once backed up, you can access them from other devices where you are signed into the same account. Google also says backed-up photos remain private unless you choose to share them.
That distinction matters because Google Photos is not simply another gallery app. Your phone may have its own local gallery while Google Photos keeps a separate cloud copy of anything you choose to back up.
Before you start organizing hundreds or thousands of pictures, I recommend getting the backup settings right first.
How to Back Up Pictures With Google Photos
On Android or iPhone, open Google Photos and sign in to the Google Account you want to use for your photo library.
Tap your profile picture or account icon, open Photos settings, then go to Backup. Make sure Backup is turned on and confirm that the correct Google Account appears as the backup account. Google Photos can back up your library to one Google Account at a time.
Once backup is enabled, Google Photos can automatically upload new pictures rather than making you remember to copy everything manually.
A few settings are worth checking while you are there:
- Confirm the correct Google Account is selected.
- Decide whether uploads can use mobile data.
- On Android, choose which device folders should also be backed up.
- Check that your account still has available storage.
- Leave the app open while a large iPhone or iPad backup is running.
That last point is easy to miss. Google specifically advises iPhone and iPad owners not to quit Google Photos while items are actively being backed up.
Do You Need to Back Up Every Phone Folder?
Not necessarily.
On Android, your camera folder is only one source of images. Screenshots, messaging apps, downloads, editing apps, and social platforms may create their own folders.
Google Photos lets you decide which available device folders should be included in your backup.
I usually prefer being selective here. There is little reason to fill cloud storage with every meme, temporary screenshot, or downloaded image unless those files actually matter to you.
A cleaner approach is to automatically back up the camera folder, then enable additional folders only when you know you want to keep their contents.
Original Quality vs Storage Saver
Google Photos gives you a choice about how pictures and videos are stored.
Original quality keeps them at the same resolution they were captured with. This makes sense when preserving maximum image quality is important, especially for high-resolution photography, detailed editing, or large prints.
Storage saver reduces file size to use less account storage. Google may resize photos larger than 16 megapixels to 16 megapixels and videos above 1080p to 1080p under Storage saver. Both new Original quality and Storage saver uploads count toward your Google Account storage.
For everyday phone photography, Storage saver can be perfectly reasonable. If your phone is your main camera and you care about keeping the highest-quality version available, I would lean toward Original quality.
Remember That Google Storage Is Shared
Every Google Account includes up to 15 GB of storage, but that space is not reserved exclusively for photos.
Google Photos, Google Drive, and Gmail all use the same account storage allocation.
That means an inbox full of large attachments or several gigabytes of Drive files can reduce the space available for your pictures.
If Google Photos suddenly stops backing up, checking available account storage should be one of your first troubleshooting steps.
How to Check Whether a Photo Is Really Backed Up
Do not assume every picture has reached the cloud just because Backup is enabled.
Open Google Photos and tap your profile picture to see the current backup status. You can also open an individual picture and look at its information to confirm whether it has been backed up.
This becomes especially important before replacing a phone, performing a factory reset, or deleting local pictures to reclaim storage.
I would always confirm the backup first.
Google’s own guidance emphasizes checking the backup account, whether Backup is enabled, device folder settings, and when mobile data is allowed for uploads.
How to Organize Pictures in Google Photos
Once backup is handled, organization becomes much easier.
You could manually place every photograph into a carefully named album, but one of Google Photos’ strengths is that you usually do not have to organize everything by hand.
Its search tools can recognize useful patterns across your library, including people, pets, places, dates, objects, and other visual details. Google Photos also provides access to categories such as Albums, Documents, Favorites, Screenshots, Videos, People & pets, and Places.
That changes how I think about organizing a large digital photo collection. Instead of creating dozens of tiny folders, you can keep the main library relatively simple and use albums for the pictures you actually want grouped together.
Create Albums for Photos You Want to Revisit
Albums are useful for things with a clear purpose.
For example, you might create albums for:
- Family vacations
- Weddings
- Your children
- Home renovation progress
- Favorite recipes
- Work projects
- Photography projects
- Important documents
Creating an album does not move the original picture out of your main Google Photos library. If you later remove an image from an album, it can still remain in your library unless you actually delete the image itself.
Google Photos albums can hold a very large number of items. Google currently allows up to 20,000 photos or videos in one album.
You can also change the album cover, reorder pictures, add text, and add locations or maps to supported albums.
Use Search Instead of Manually Sorting Everything
This is probably the Google Photos feature I would rely on most heavily once a photo library gets large.
You can search for things such as:
- Beach
- Dog
- Birthday
- New York
- Sunset
- A person’s name
- A particular year or date
- Documents
- Screenshots
- Videos
If Face Groups are available and enabled for your account, you can label recognized people or pets. Once you have assigned a name, finding pictures of that person becomes much faster.
Location information can help too. Google Photos can use location information stored by your camera, locations you add manually, and in some cases estimated locations to make pictures easier to organize and search.
Some search and face-related features vary by country, account type, and availability, so your app may not show every feature described here.
What About Ask Photos?
Google has also been adding a more conversational search experience called Ask Photos.
Instead of entering only simple terms, supported accounts can ask more descriptive questions about their photo libraries. Google says Ask Photos can work with queries involving people, places, activities, and other details from your pictures. The feature requires opting into Gemini features in Google Photos and is not available everywhere or for every account.
I would treat this as a useful extra rather than something you need for basic photo organization. Traditional search is still very effective for straightforward requests.
Use Favorites for the Pictures That Matter Most
Albums are useful for groups of related pictures. Favorites are better when you simply want quick access to individual photos you love.
Whenever you find a picture that you know you will want again, mark it as a Favorite.
That could include a great family portrait, an important travel photo, a reference image for work, or simply a picture that makes you smile.
This simple habit can save you from searching through several years of pictures later.
Editing Photos Inside Google Photos
Google Photos also handles a surprising amount of everyday editing.
Open a picture and tap Edit. Depending on your device, account, and the photo itself, you may see options for suggested adjustments, cropping, rotation, filters, brightness, contrast, warmth, saturation, markup, and other tools. Google notes that some editing features are device-specific or unavailable on the web.
For most phone photos, I would start small.
Crop Before Doing Anything Else
Cropping can often improve a picture more than a dramatic filter.
Look around the edges of the frame. Remove distracting empty space, straighten a crooked horizon, and position your main subject where the composition feels natural.
Google Photos includes crop, rotate, straighten, perspective, and other framing controls on supported devices.
A simple crop can turn an average snapshot into a much stronger photograph.
Adjust Light and Color Carefully
Google Photos offers controls such as brightness, contrast, saturation, warmth, and HDR-related adjustments depending on your device.
The trick is not to push every slider as far as it will go.
If a picture is dark, increase brightness enough to recover the subject. If colors look flat, add a little saturation. If indoor lighting made skin tones look too orange or blue, adjust the warmth.
Small changes usually age better than heavy editing.
Try Google’s Suggested Edits
If you do not want to adjust individual settings, Google Photos can suggest edits based on the picture.
On supported devices, options may include tools such as Enhance, Dynamic, or AI Enhance. The exact selection depends on the photo and the device you are using.
These automatic suggestions are worth trying because you can compare the edited version against the original before deciding what looks better.
Some Advanced Tools Depend on Your Phone
Google Photos now includes more advanced editing features on certain supported devices, including tools such as Magic Eraser, Unblur, Portrait Light, and other AI-assisted adjustments.
Availability varies. Some tools require particular hardware, Android versions, memory levels, or Pixel models.
So if a tutorial shows a button that does not appear on your phone, that does not necessarily mean anything is wrong with your app.
Free Up Space Without Losing Your Backed-Up Pictures
One of the most useful Google Photos features appears when your phone starts running low on storage.
After confirming that your pictures are safely backed up, Google Photos can remove eligible local copies from your phone while keeping the cloud versions available in your Google Photos library.
On Android, tap your profile picture and choose Free up space on this device. Google will show how much device storage can be reclaimed before you confirm the removal.
There is an important distinction here.
Free up space removes local device copies that have already been safely backed up.
Deleting a picture normally from Google Photos is different. Depending on your setup, deleting can also remove the item from your Google Photos library.
That is why I would use the dedicated Free up space feature rather than manually deleting hundreds of pictures from the gallery after backup.
A Simple Google Photos Routine That Actually Works
You do not need to spend an afternoon reorganizing your entire photo history.
A few habits are enough:
- Keep automatic Backup turned on.
- Check occasionally that the correct account is backing up.
- Use albums for major events and ongoing projects.
- Favorite the pictures you care about most.
- Search instead of manually creating dozens of folders.
- Edit only the photos worth improving.
- Review your Google Account storage occasionally.
- Use Free up space only after confirming backup.
Once that routine is in place, Google Photos becomes almost invisible. Your pictures arrive, get backed up, remain searchable, and are there when you need them.
Better Organization Starts With Better Photos
Google Photos can straighten a picture, improve the lighting, crop away distractions, and make a huge camera roll easier to search. What it cannot do completely is replace a photograph that was framed poorly or captured from too far away.
That is where phone camera accessories start to make sense.
You do not need accessories to use Google Photos, of course. But if you are already taking hundreds of phone pictures that end up in your Google Photos library, a simple lens attachment or steadier camera grip can give you better material to organize and edit later.
The first option is aimed more at experimenting with different types of photography.
1
Cell Phone Camera Lens Kit 11 in 1: Best for Trying Different Phone Photography Styles
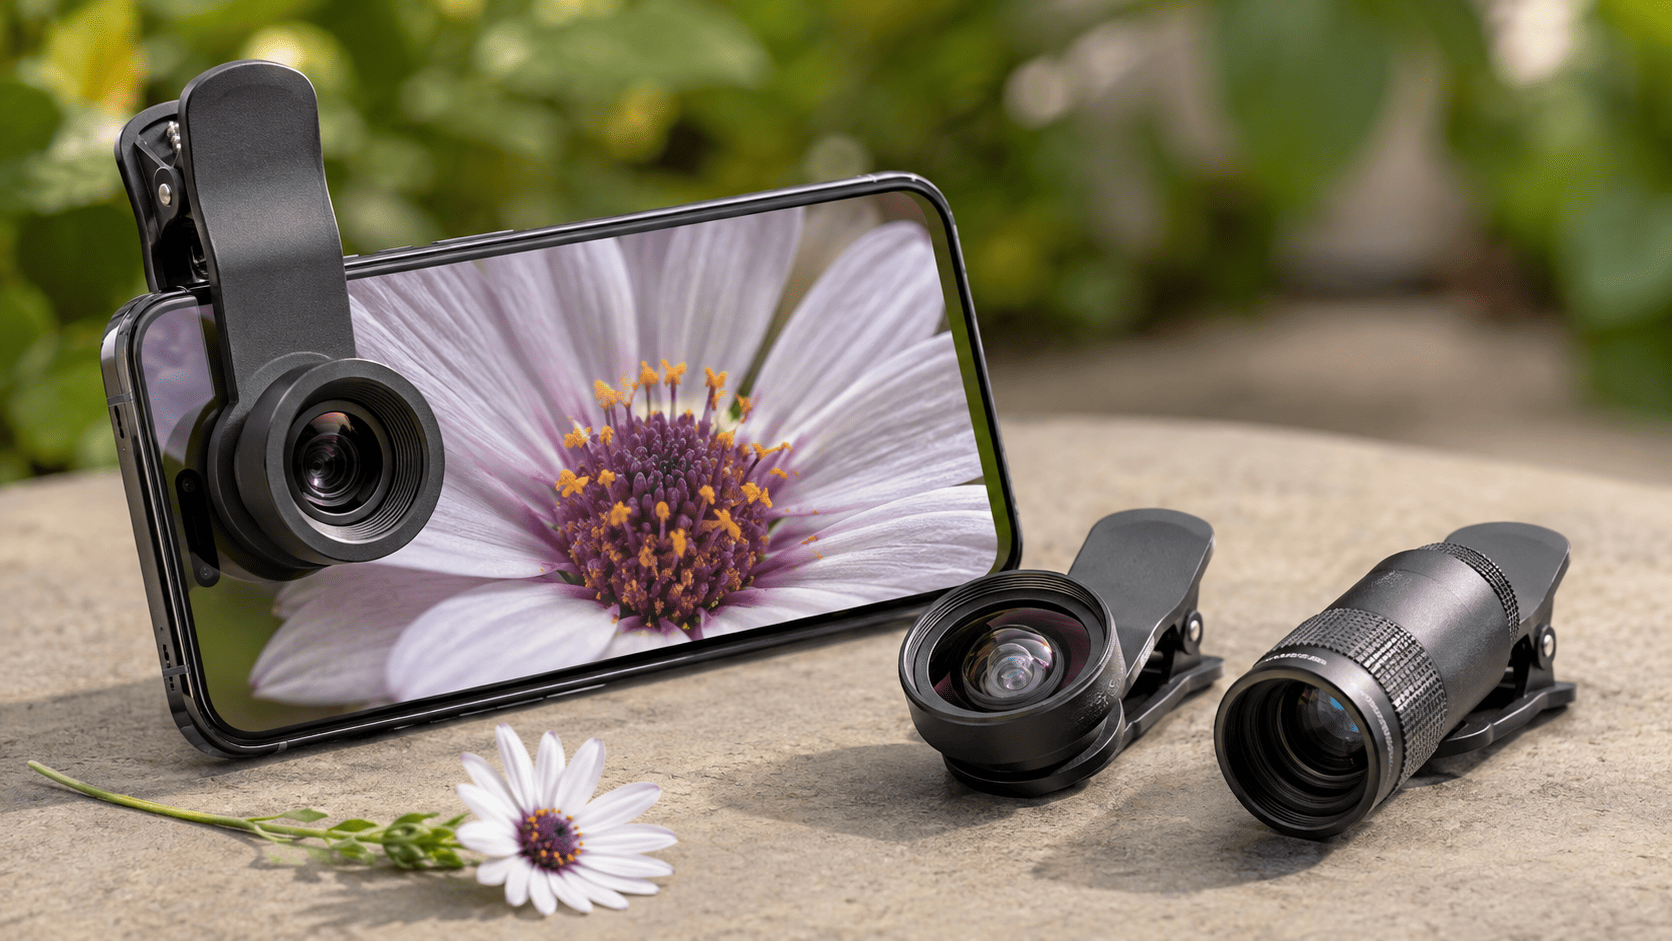
The Cell Phone Camera Lens Kit 11 in 1 makes the most sense if you enjoy experimenting with what your phone camera can capture.
The kit combines several attachments rather than focusing on one type of photography. The listing includes a 20x telephoto lens, 0.63x wide-angle lens, 15x macro lens, 198-degree fisheye lens, 2x telephoto lens, kaleidoscope effects, CPL filter, starlight effect, and additional accessories.
The macro lens is probably the attachment I would find most interesting for everyday experimentation. It gives you another way to photograph small subjects such as flowers, textures, crafts, jewelry, food details, or objects around the house. The wide-angle and fisheye attachments are more about changing perspective, while the telephoto options are meant for subjects that are farther away.
This is a universal clip-style kit, so convenience is the main attraction. You can move it between compatible smartphones rather than buying a phone-specific case system.
There is one reason to keep expectations realistic. The Amazon information you provided shows a 3.7 out of 5 rating from roughly 3,500 reviews. That is respectable for an inexpensive multi-lens kit, but it also suggests this is more of a fun photography accessory than a replacement for a phone with dedicated high-end camera lenses.
At around $32.21 based on the price you supplied, I would consider it mainly for someone who wants more variety in the pictures going into Google Photos without carrying a separate camera bag.
Lens attachments give you more framing choices, but they do not solve another common phone photography problem: keeping the phone steady while trying to compose a shot, record yourself, or take a group picture.
If stability and easier shooting matter more to you than adding different lenses, I would look at a camera-style phone grip instead.
2
ULANZI CG02 Smartphone Camera Grip: Best for More Comfortable Phone Photography

The ULANZI CG02 Upgraded Smartphone Camera Shutter Handle Grip takes a completely different approach.
Instead of changing what your phone camera sees, it is designed to make the phone easier to hold and control while shooting. It gives your smartphone more of a traditional camera-style grip and includes a detachable Bluetooth shutter remote.
That remote can be genuinely handy. Rather than tapping the screen and potentially moving the phone just as the picture is taken, you can trigger the shutter remotely. It is also useful when the phone is positioned away from you for a group picture, self-portrait, product photo, or short video.
The CG02 also includes an adjustable fill light with three brightness levels. That will not replace proper photographic lighting, but a little extra light can help when you are shooting faces, products, food, or close-up objects in dim indoor conditions.
For me, the appeal here is less about flashy effects and more about making phone photography comfortable. Modern phones take excellent pictures, but their thin rectangular shape is not always ideal when you are intentionally composing several shots.
Based on the information you provided, the CG02 has a 4.1 out of 5 Amazon rating from around 1,600 reviews and was listed at about $24.95. That puts it below the multi-lens kit in price.
I would choose this one for someone who already likes the camera lenses built into their phone but wants steadier handling, an easier shutter button, remote shooting, and a small amount of fill light.
Which Accessory Makes More Sense With Google Photos?
These two accessories solve different problems, so I would not choose between them based only on price.
Go with the 11 in 1 Cell Phone Camera Lens Kit if you want to experiment with macro, telephoto, wide-angle, fisheye, and other creative perspectives. It gives you more variety in the kinds of pictures you can add to your Google Photos library.
Choose the ULANZI CG02 if you are already happy with your phone’s camera but want a more comfortable way to hold it, trigger the shutter remotely, and add a little light when needed.
Neither accessory makes Google Photos itself better. What they can do is help you capture pictures that need less rescuing later.
Final Thoughts
The easiest way to get more value from Google Photos is to treat it as a complete photo workflow rather than just a backup app.
Start by turning on Backup and confirming that your pictures are going to the right Google Account. Pick Original quality or Storage saver based on how much you care about maximum image quality versus storage use. Then rely on Search, Albums, Favorites, people and place organization, and Google’s editing tools to keep the library manageable.
When your phone starts getting full, confirm your backup and use Free up space instead of randomly deleting pictures.
And if you want to improve the photos that eventually end up in Google Photos, the accessory choice is fairly simple. The 11-in-1 lens kit is the better fit for someone who wants to experiment with different types of phone photography, while the ULANZI CG02 makes more sense if you want steadier, more comfortable shooting with a remote shutter and fill light.
Get the backup routine right first. After that, Google Photos becomes much less about managing thousands of files and much more about actually finding and enjoying the pictures you took.